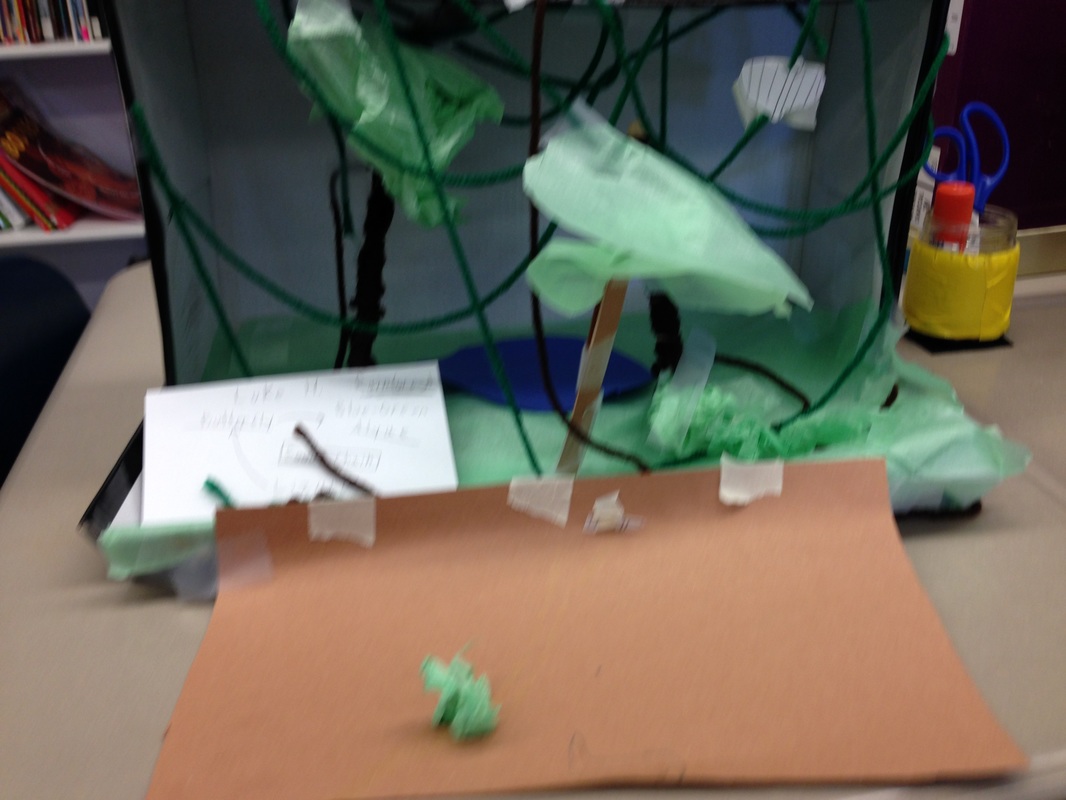
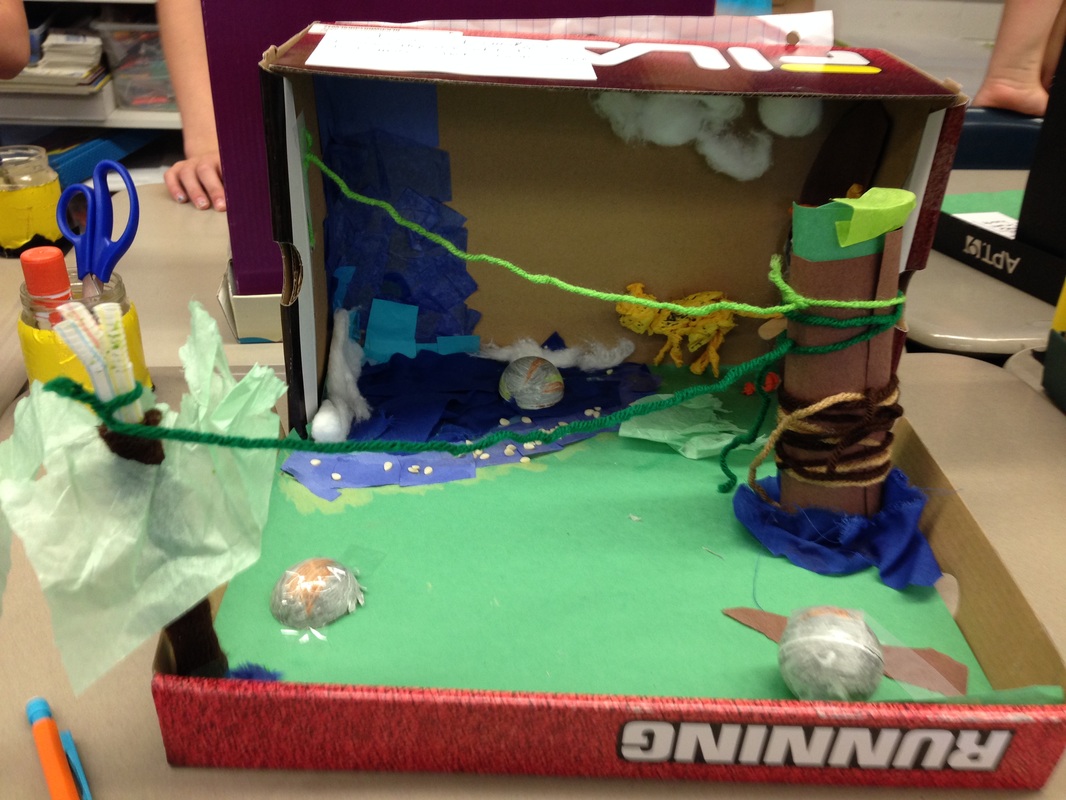
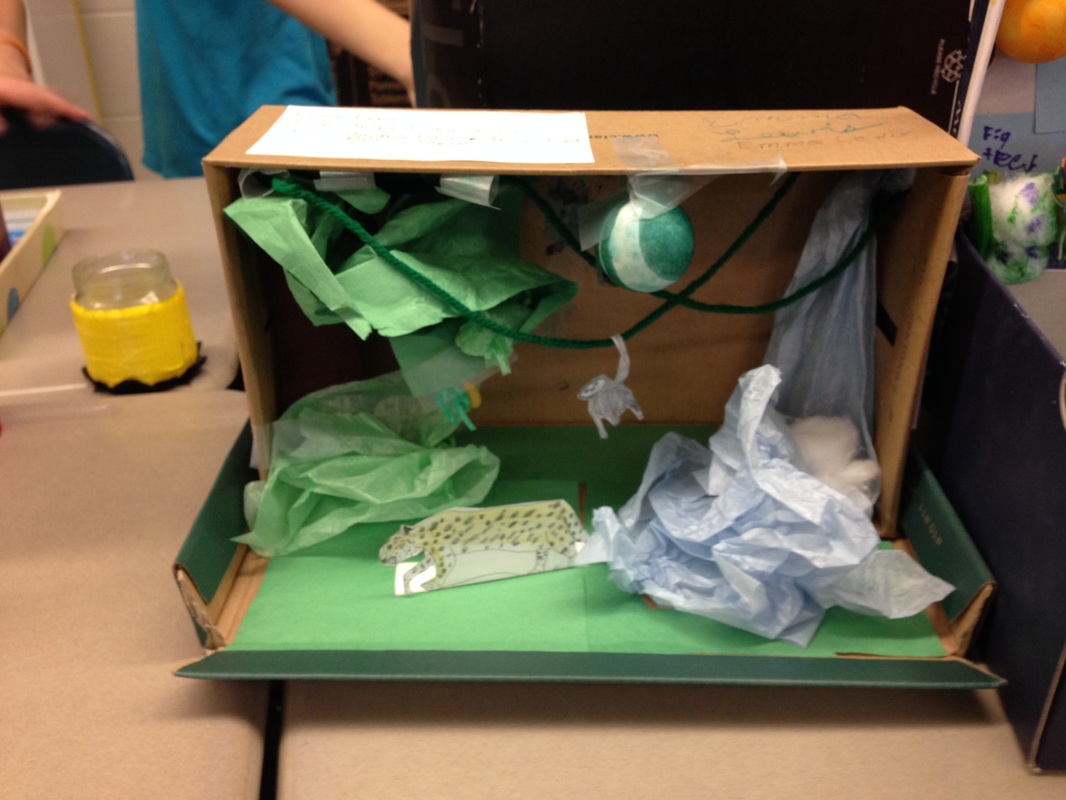
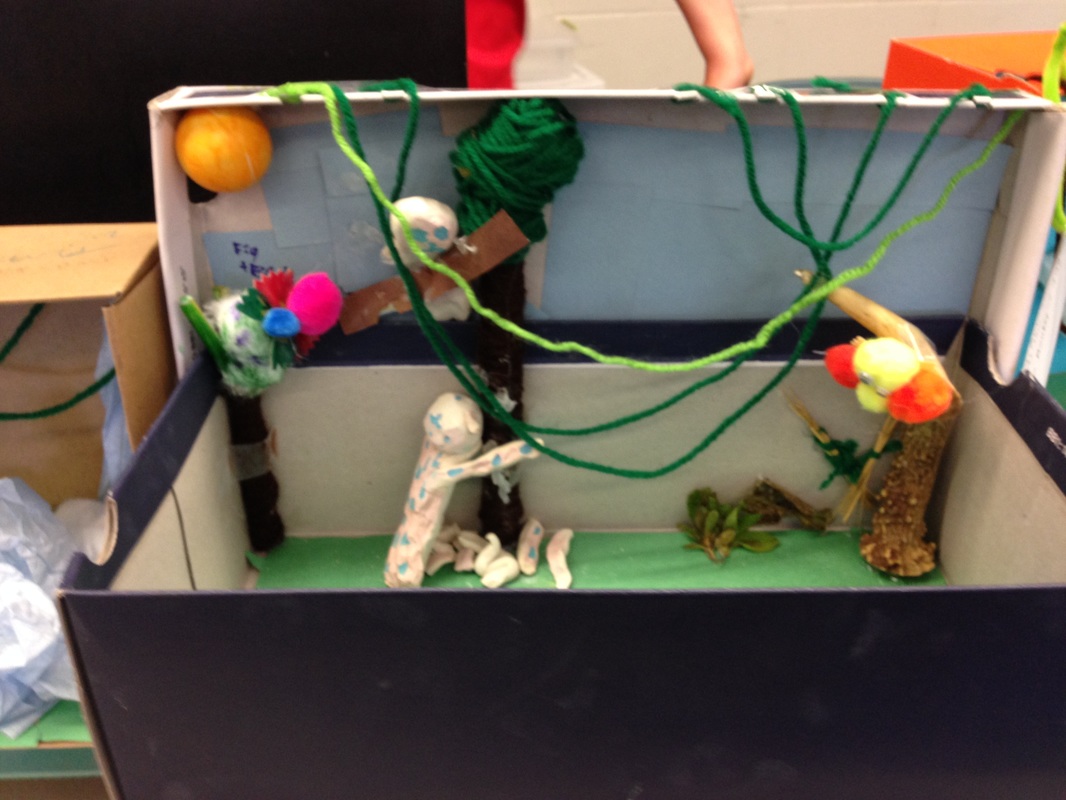
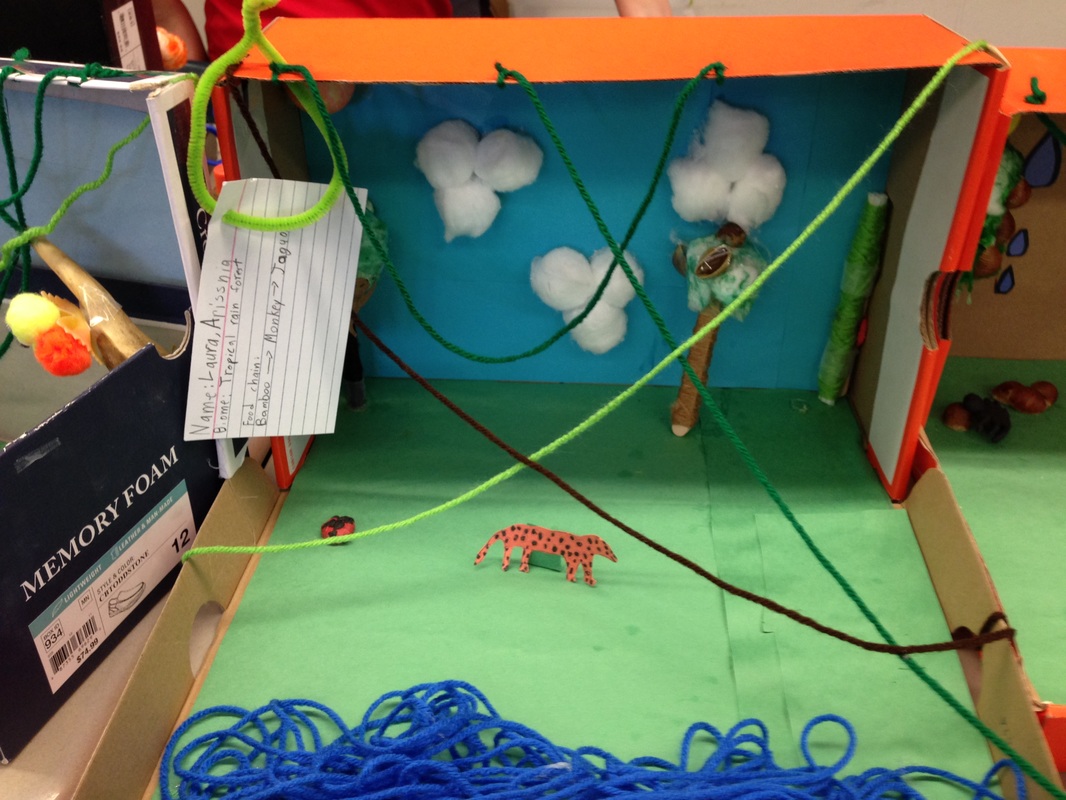
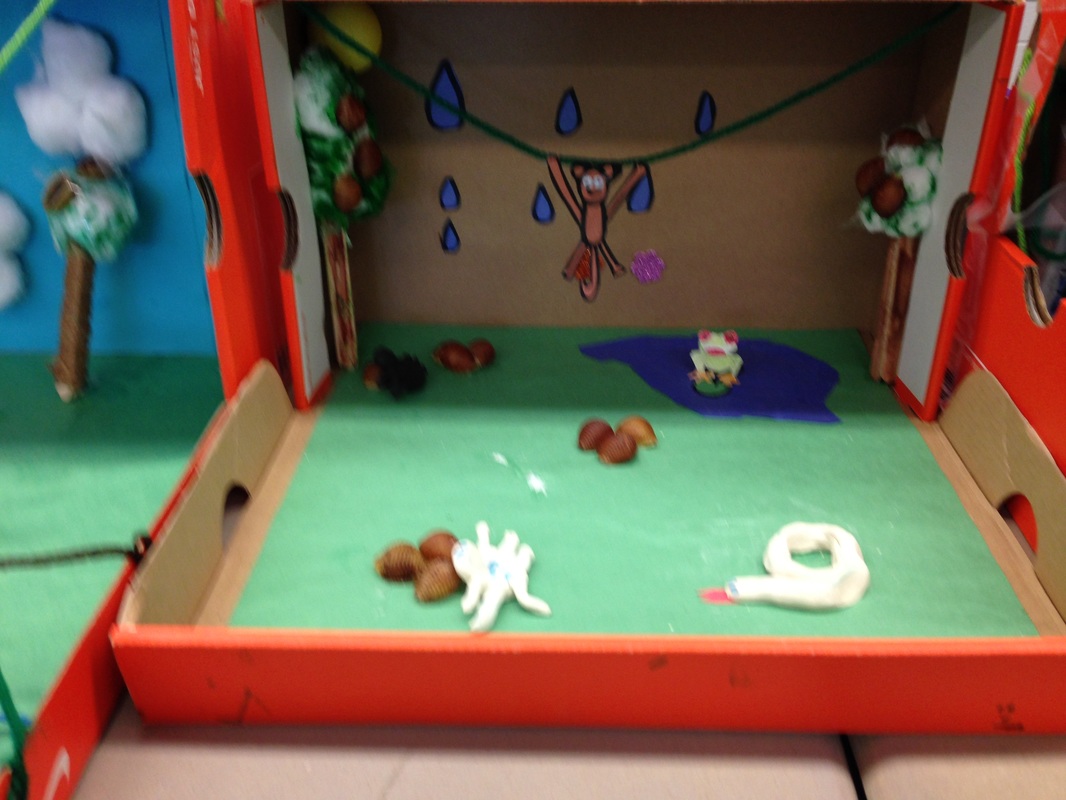
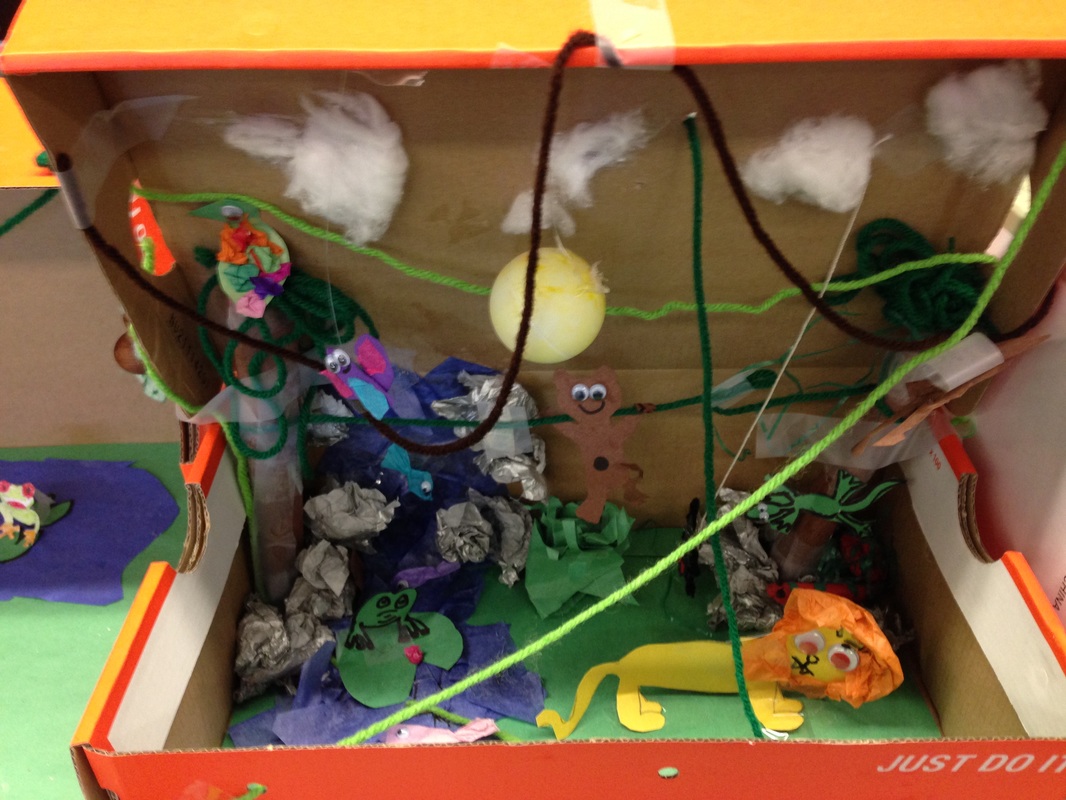
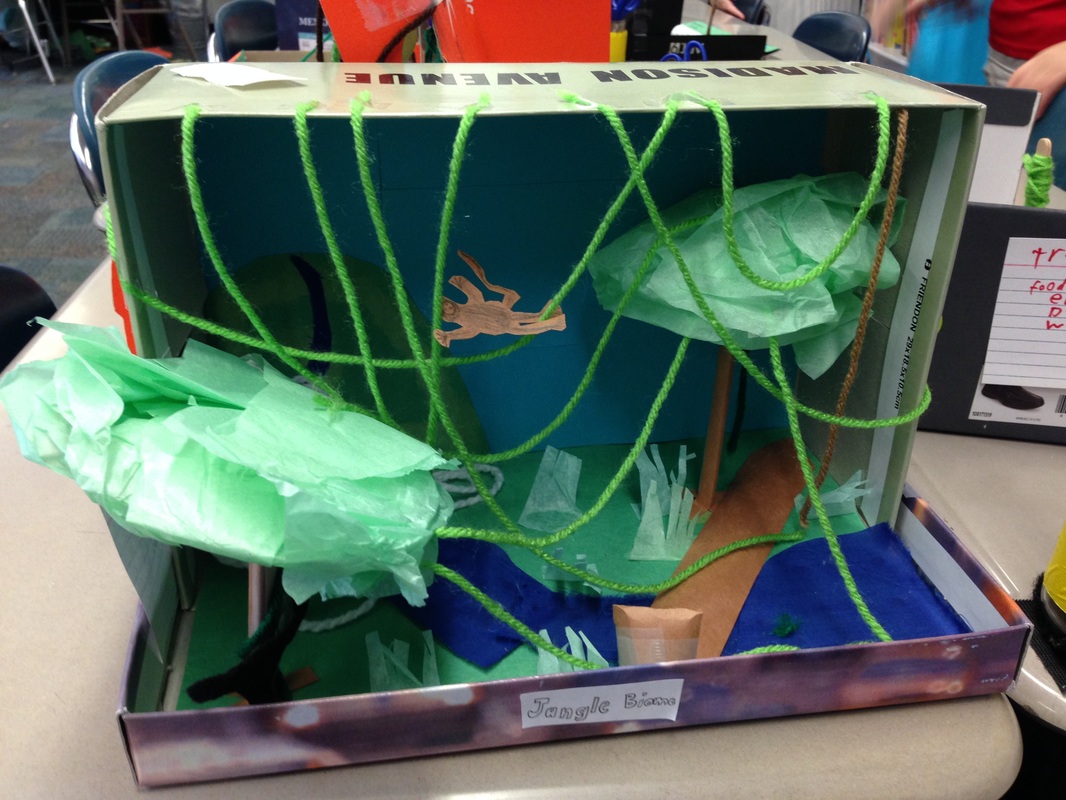
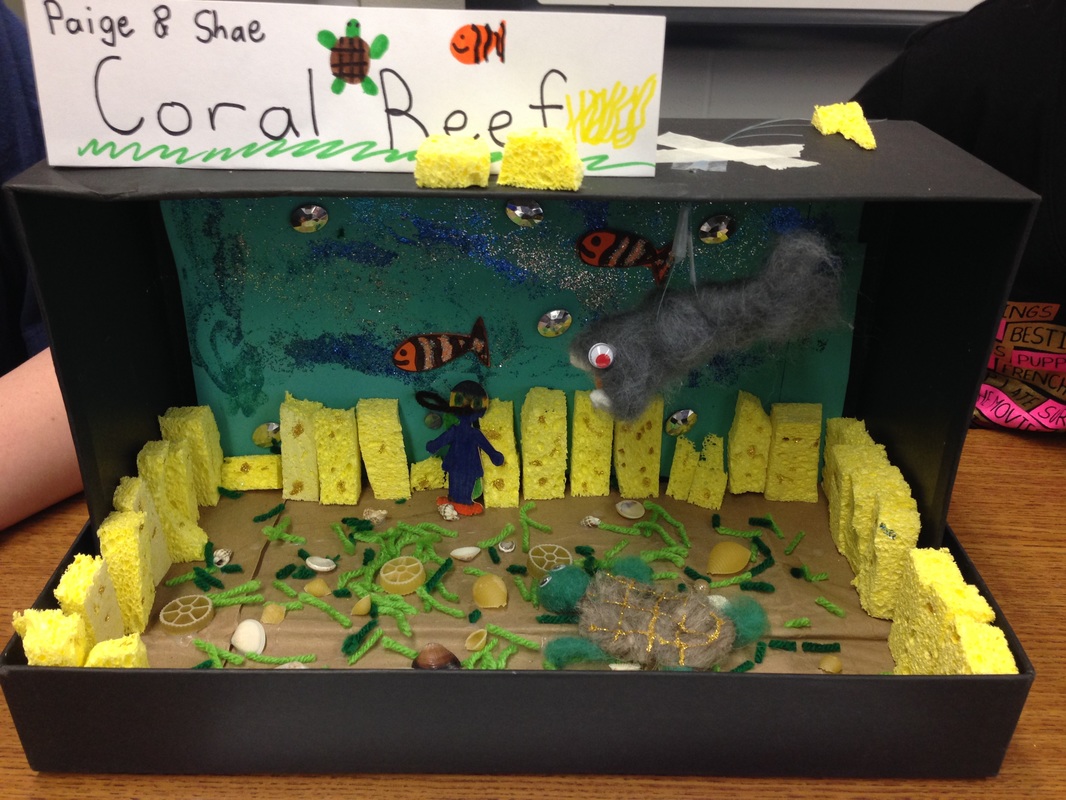
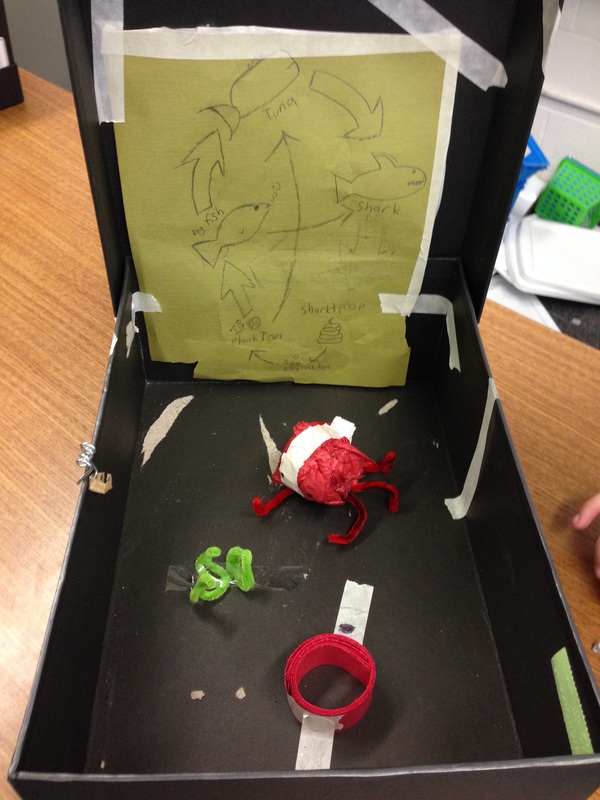
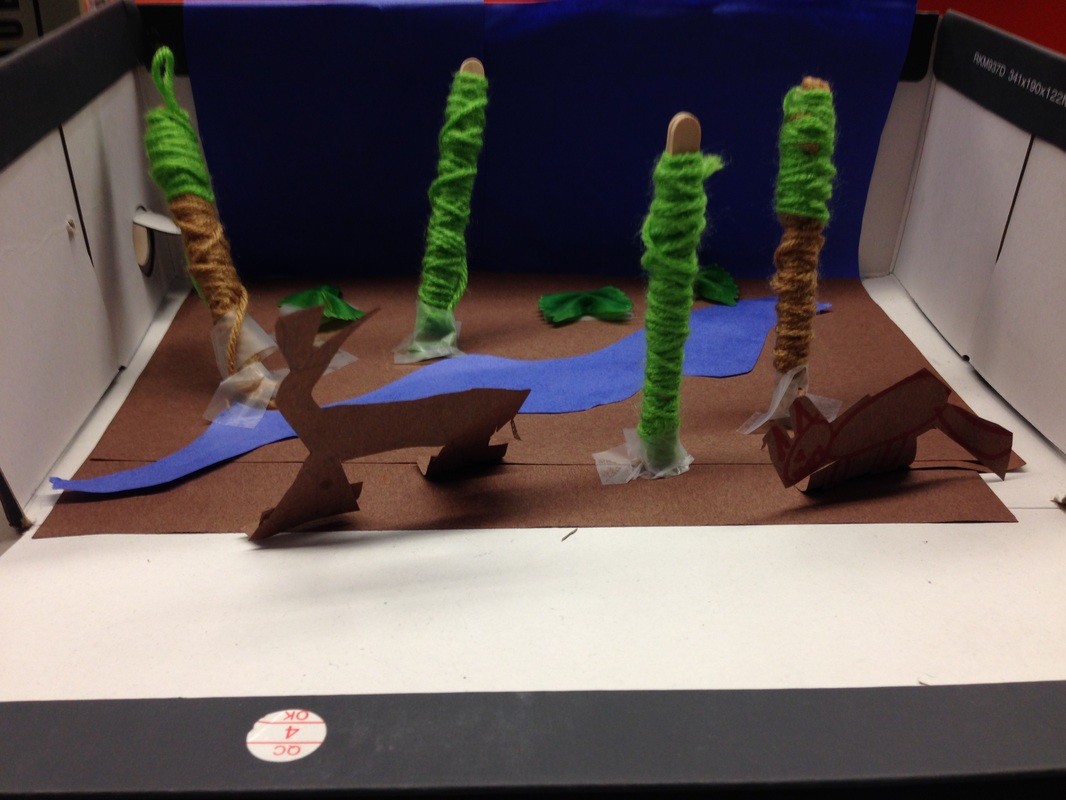
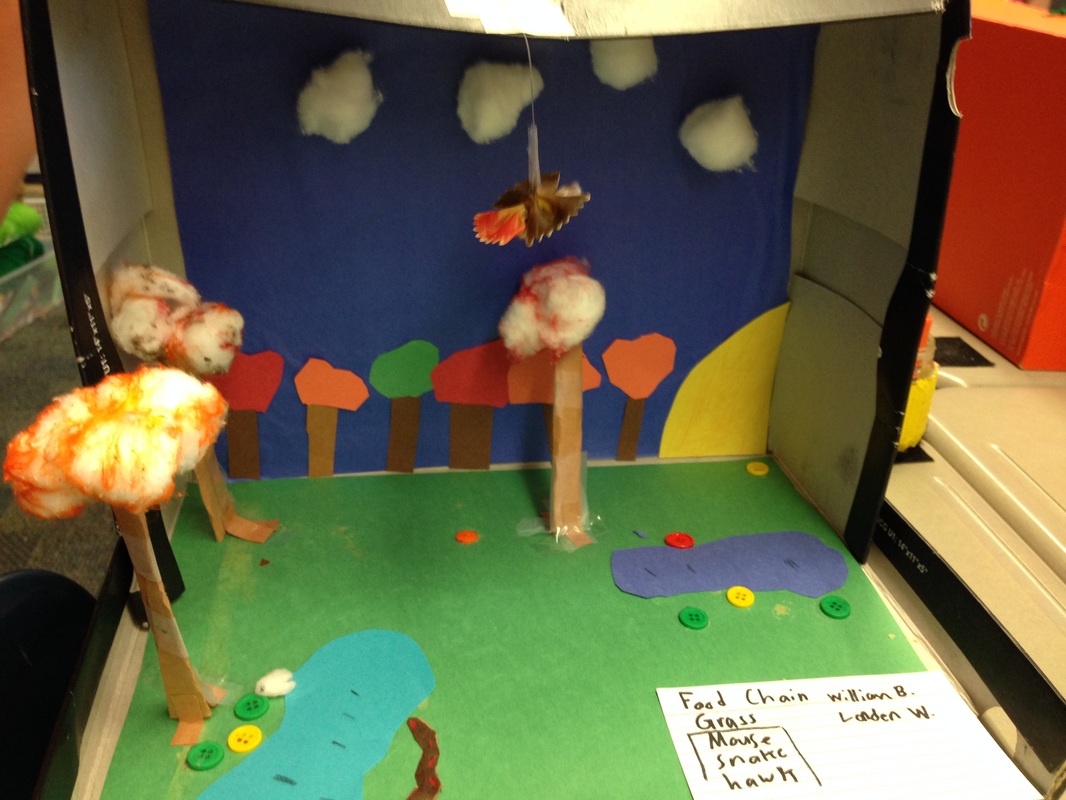
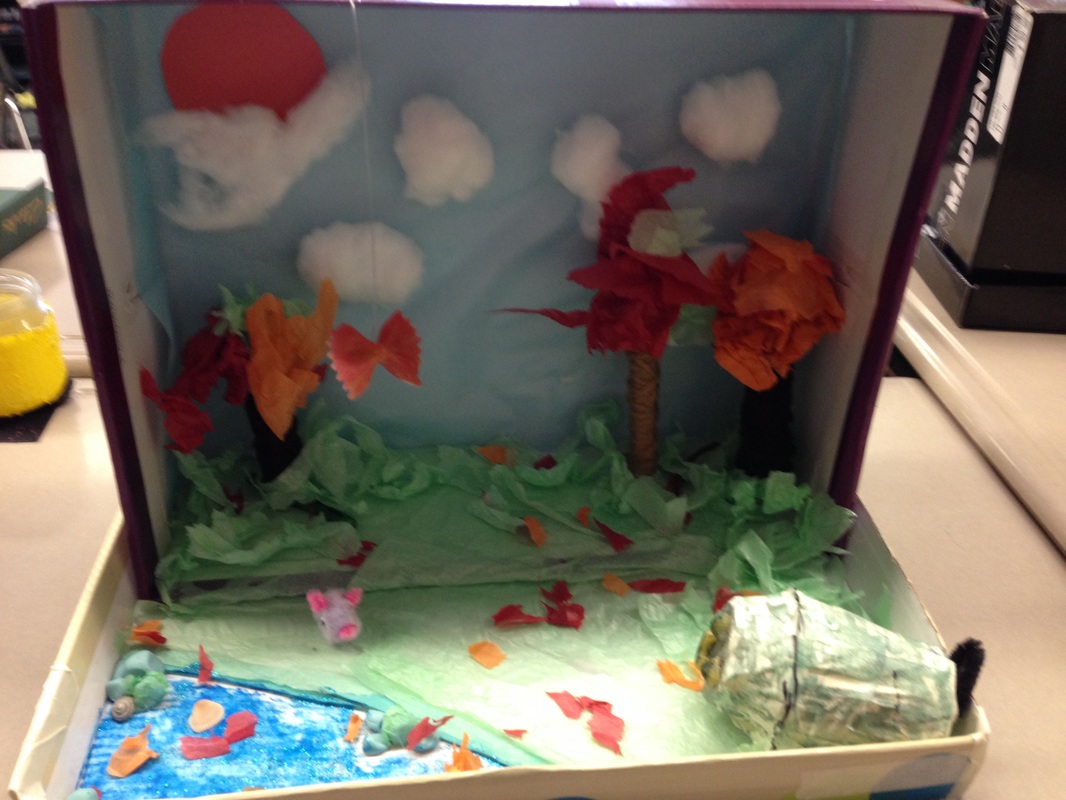
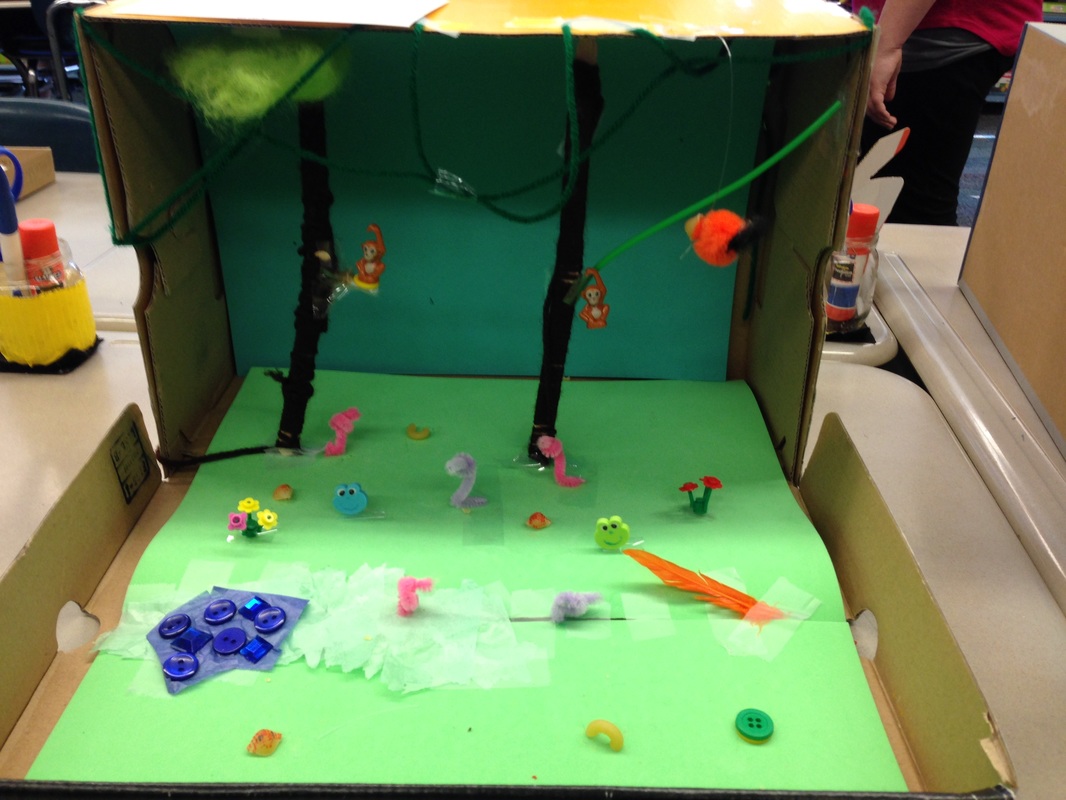
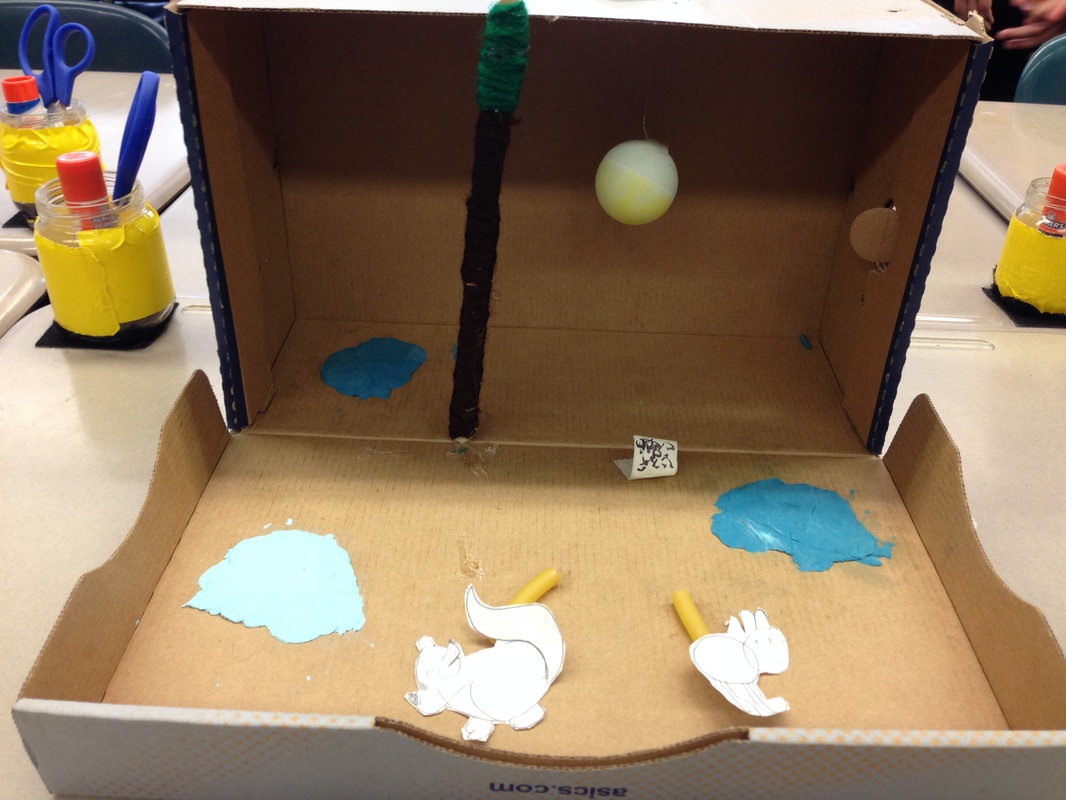
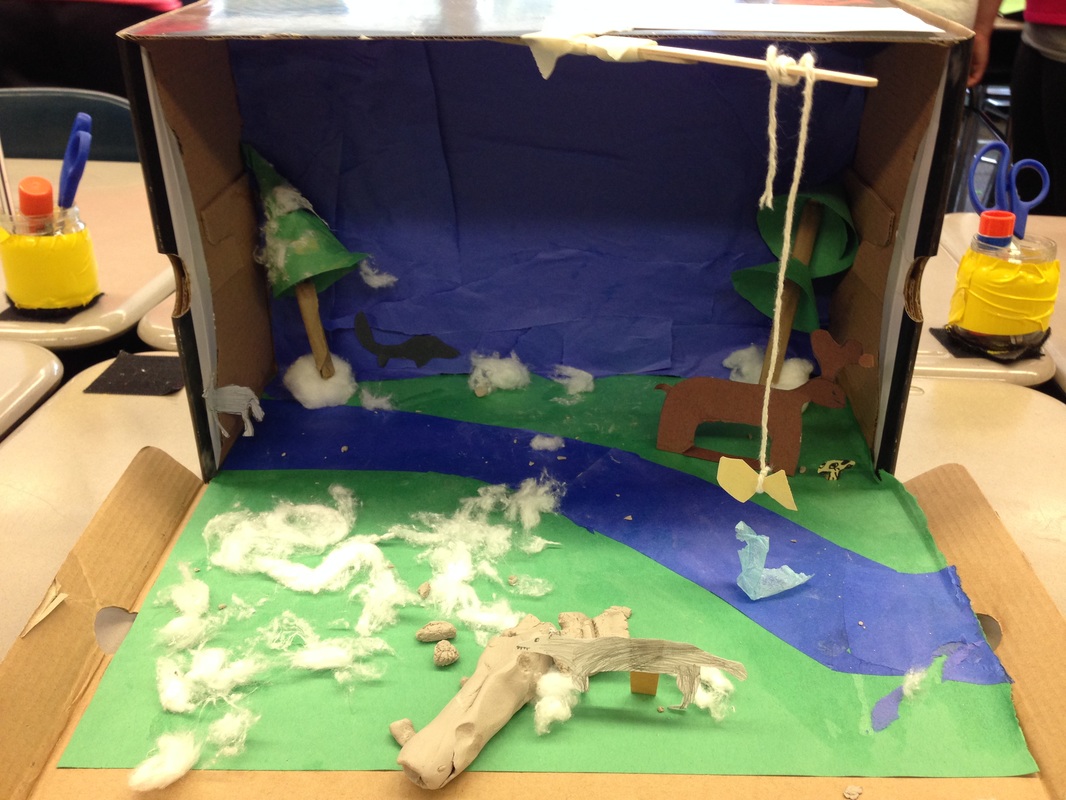
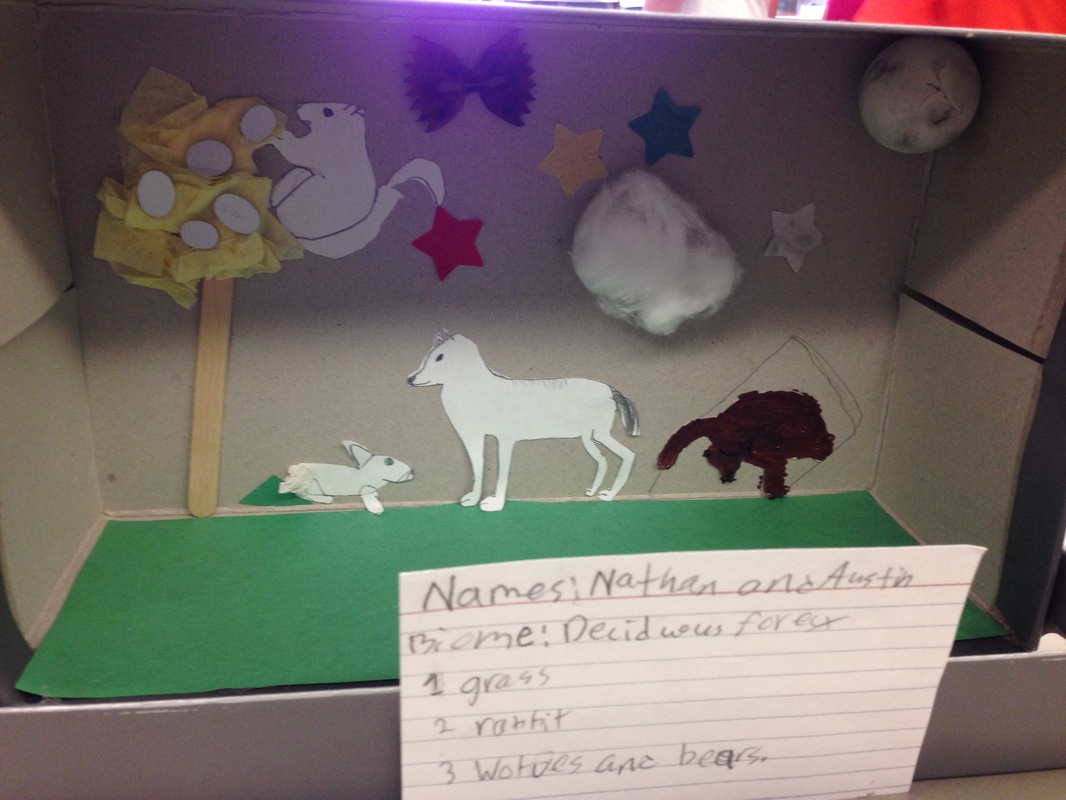
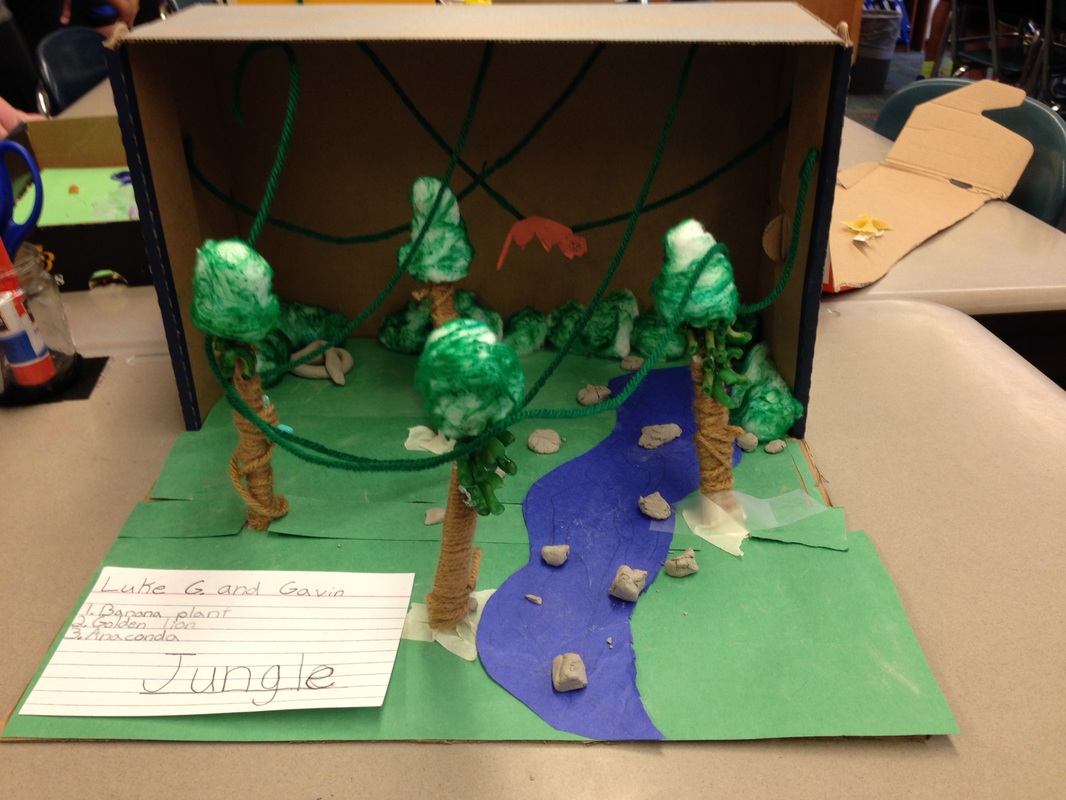
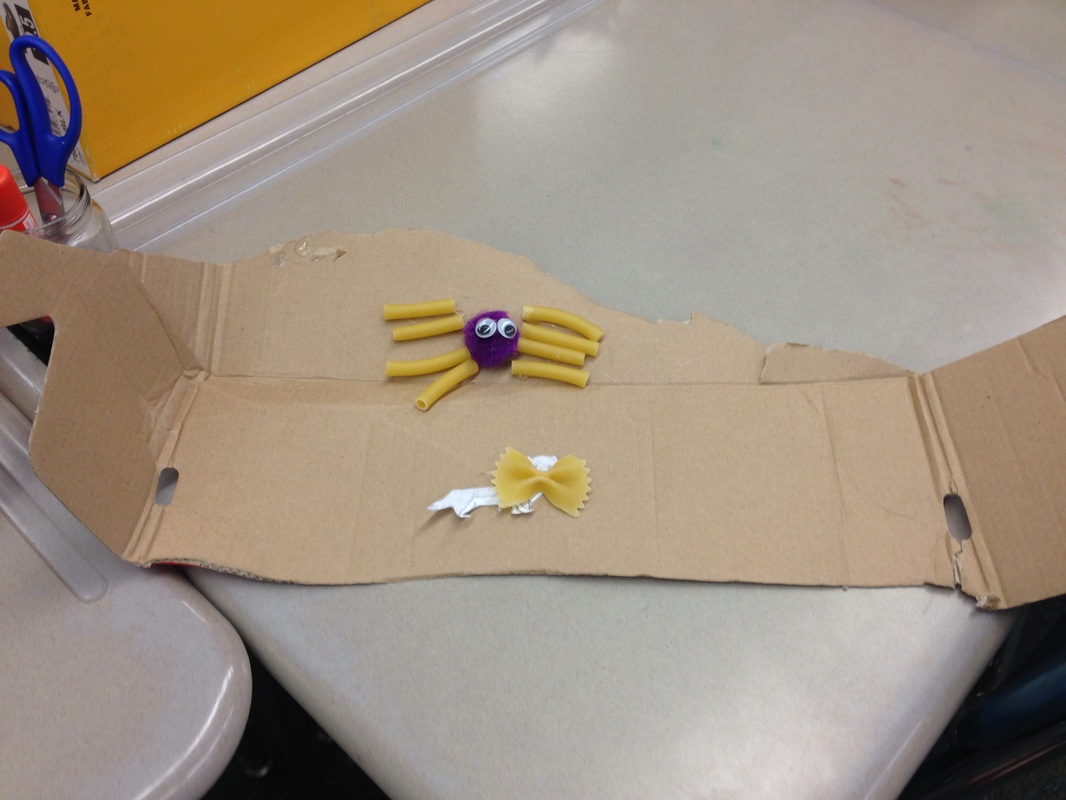
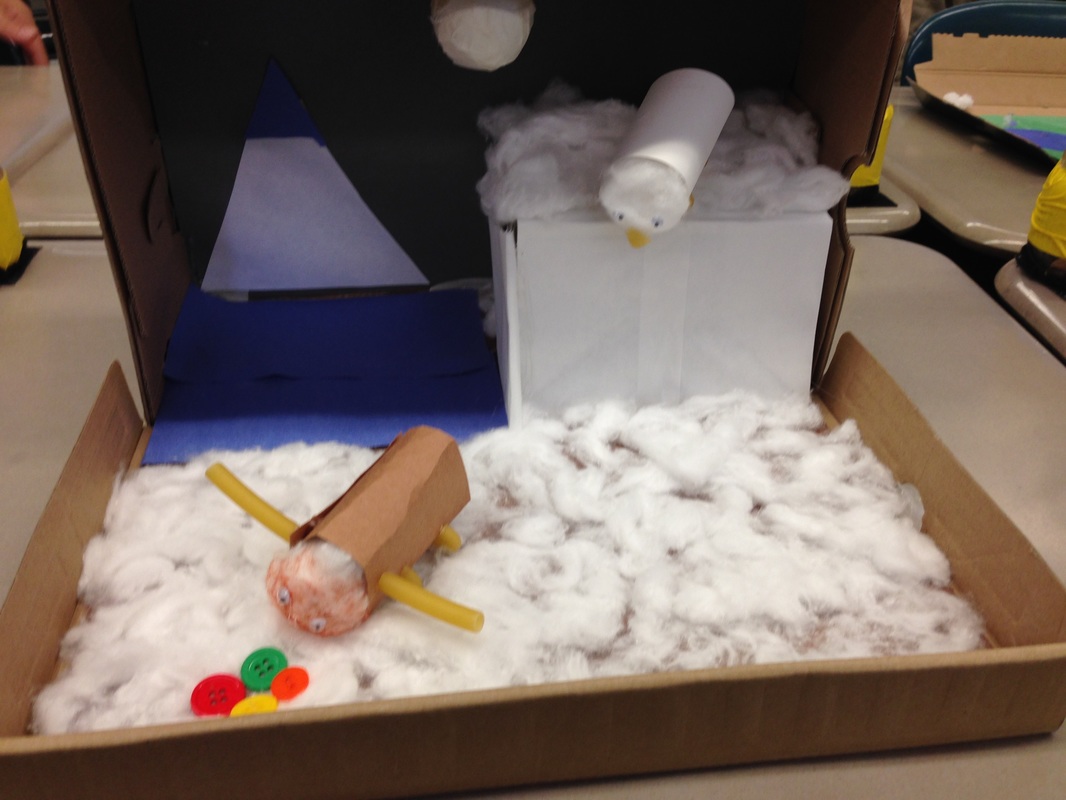
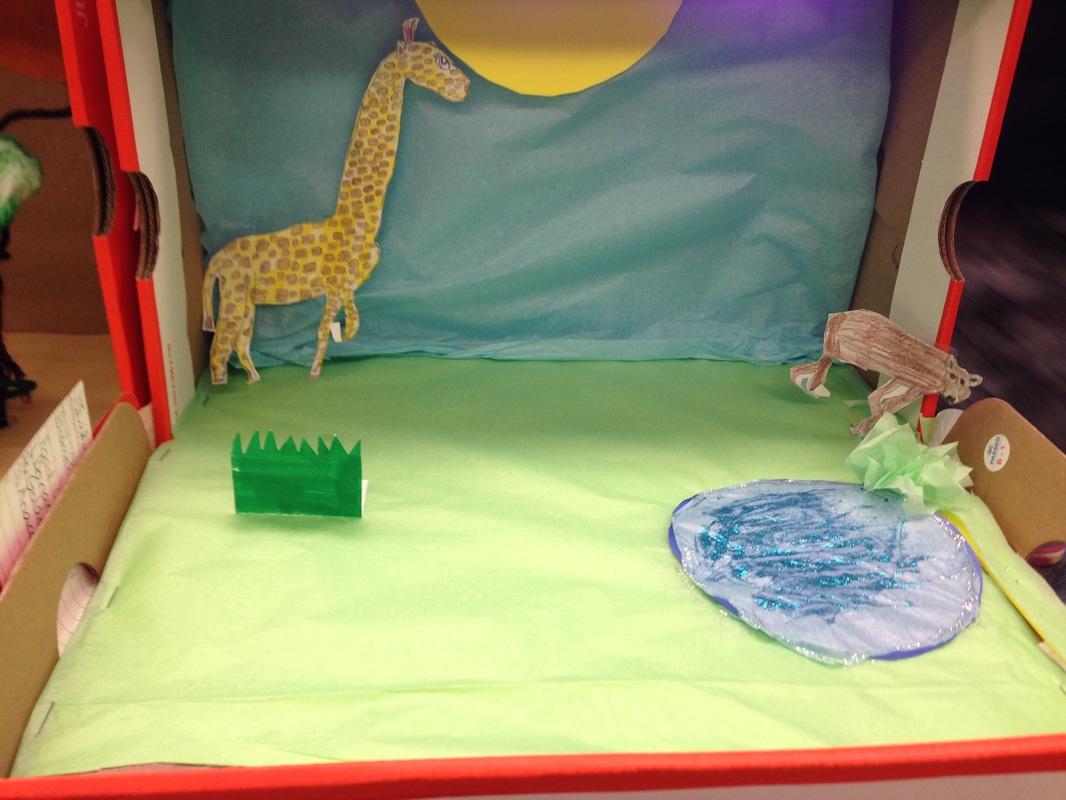
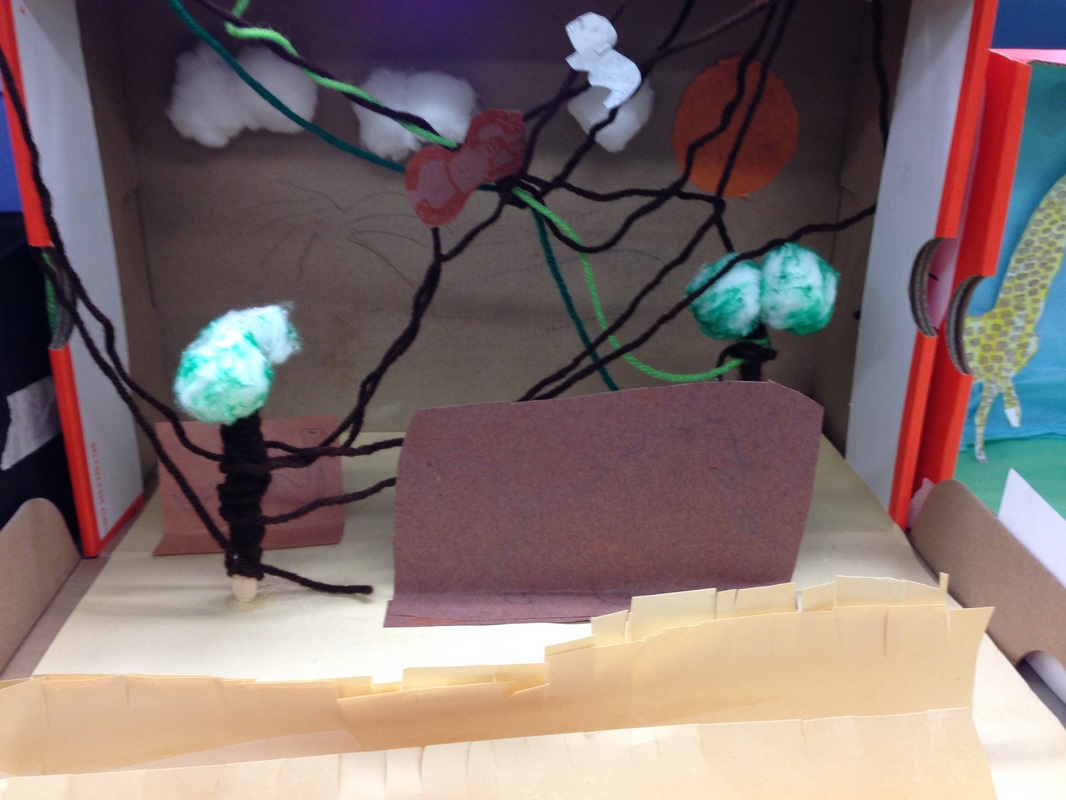
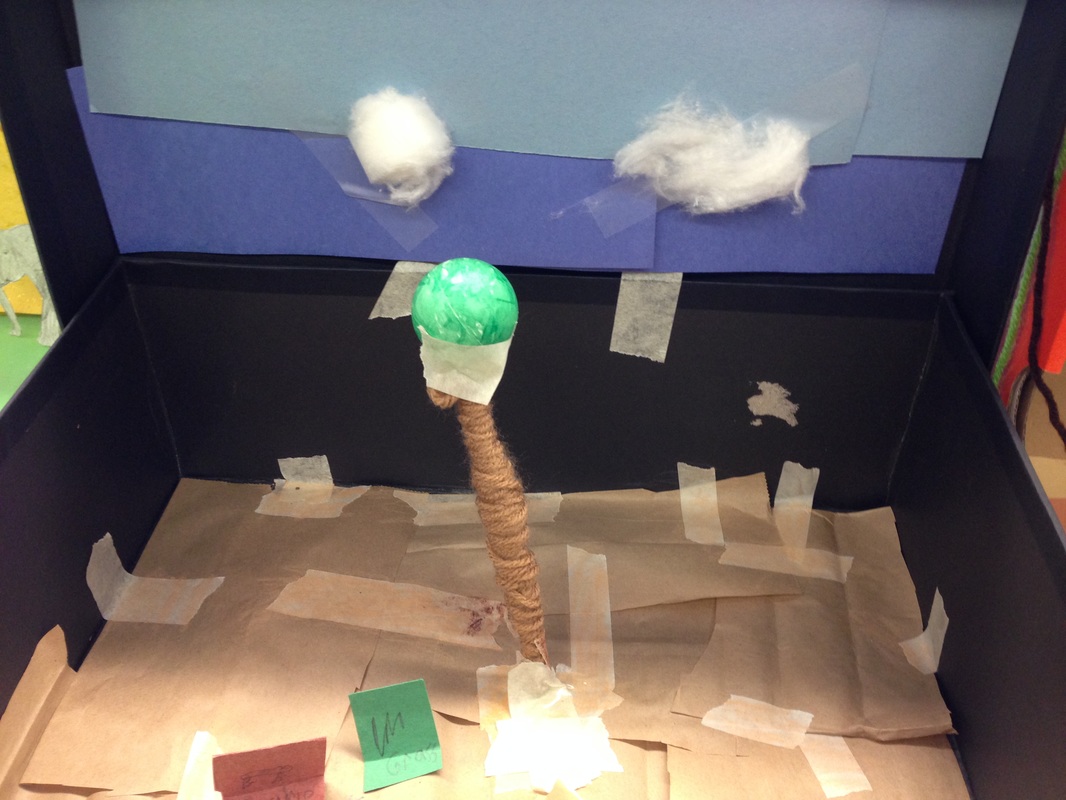
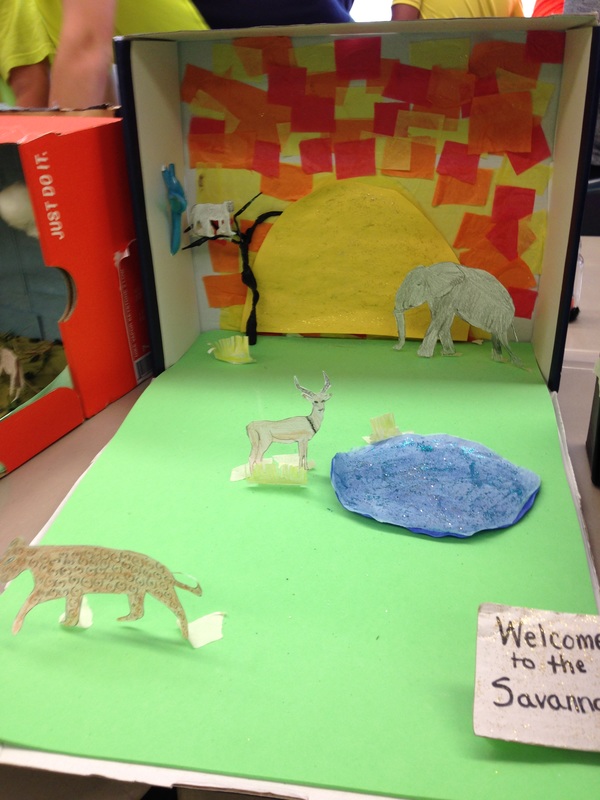
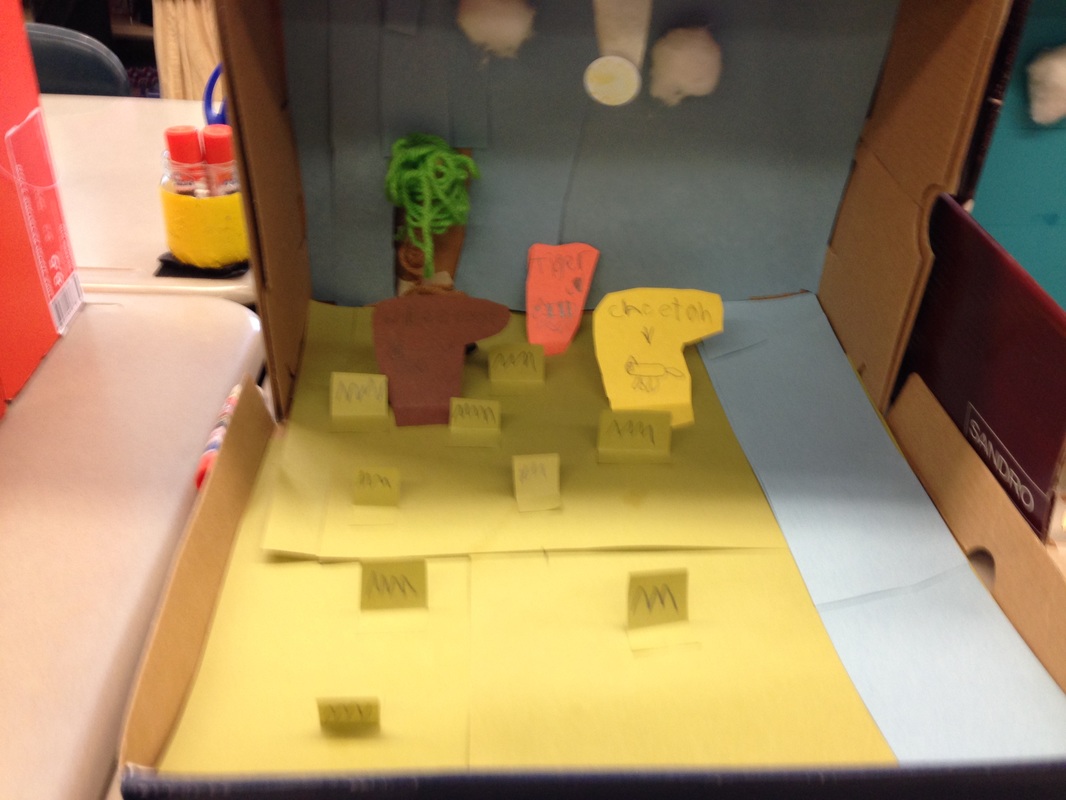
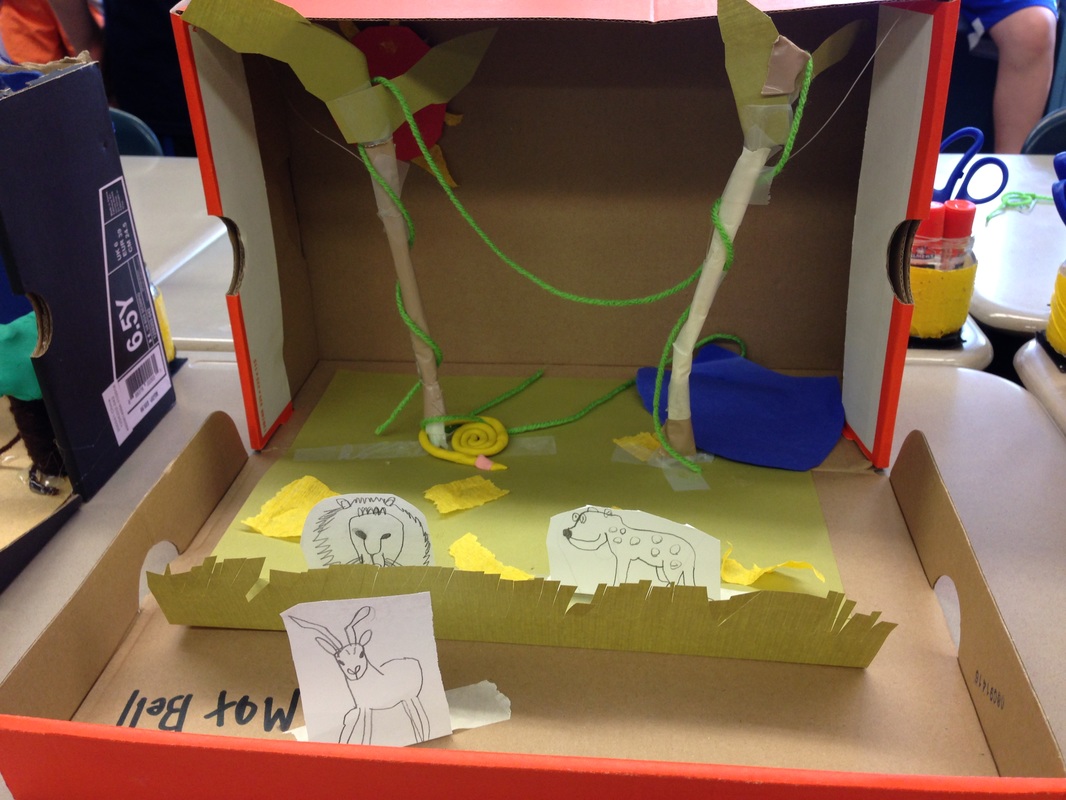
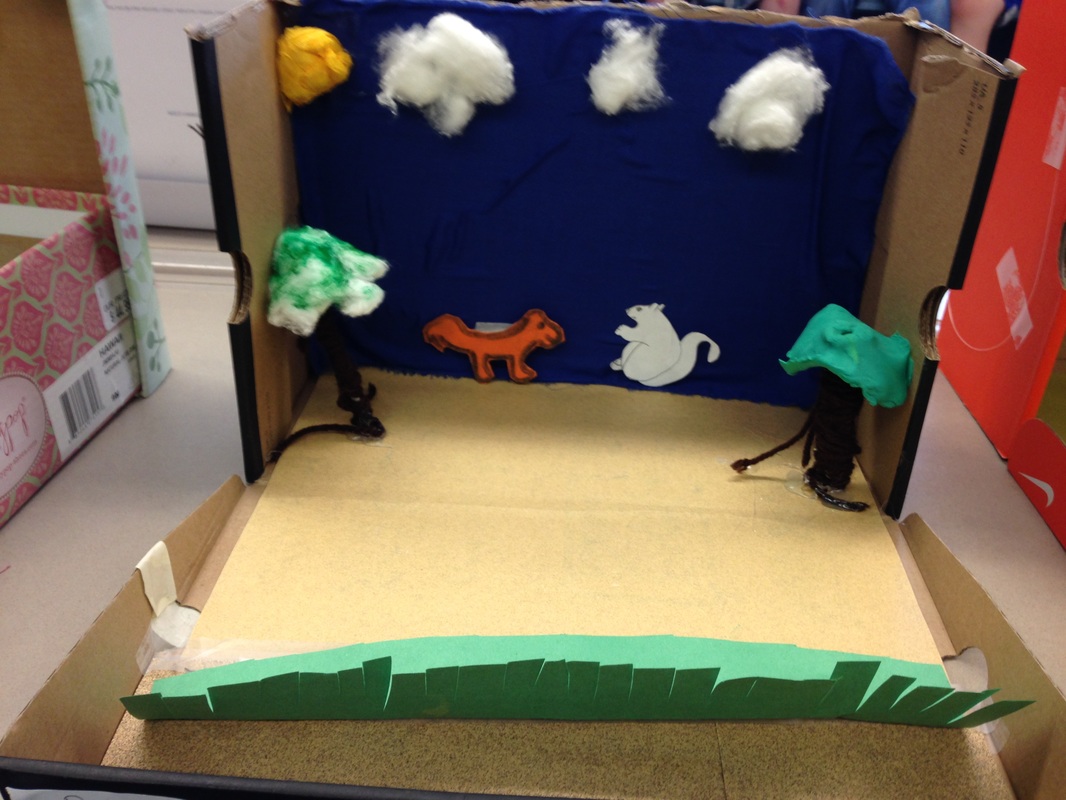
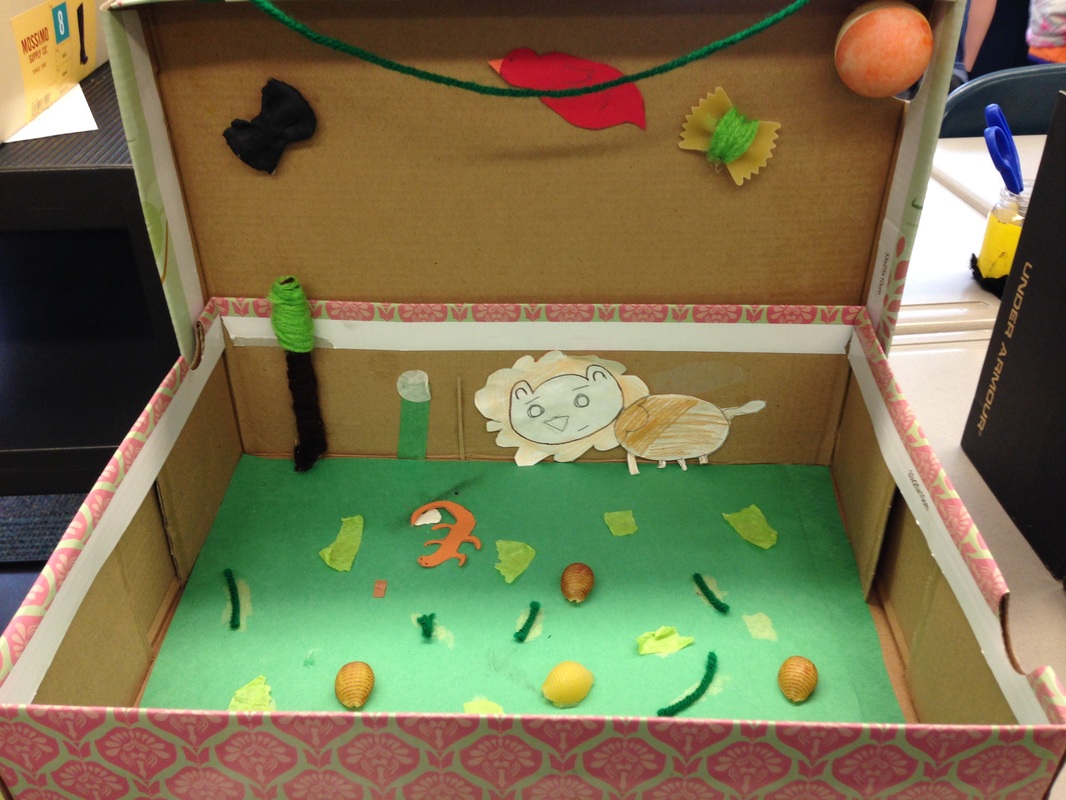
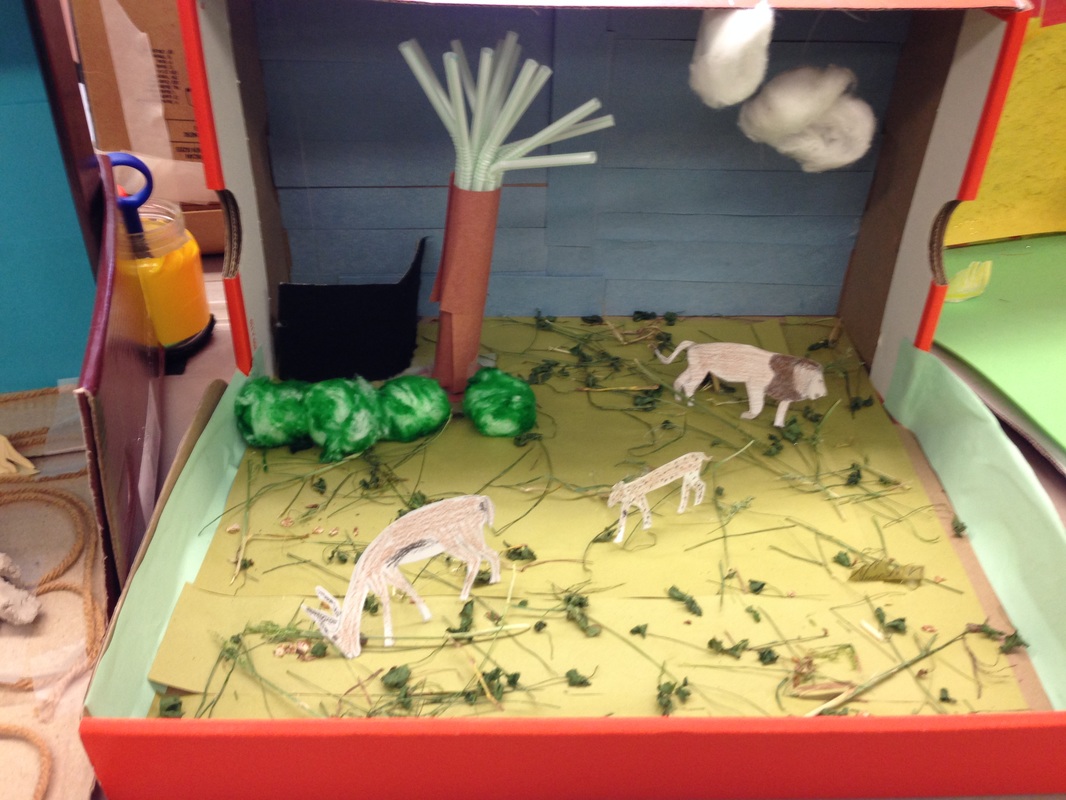
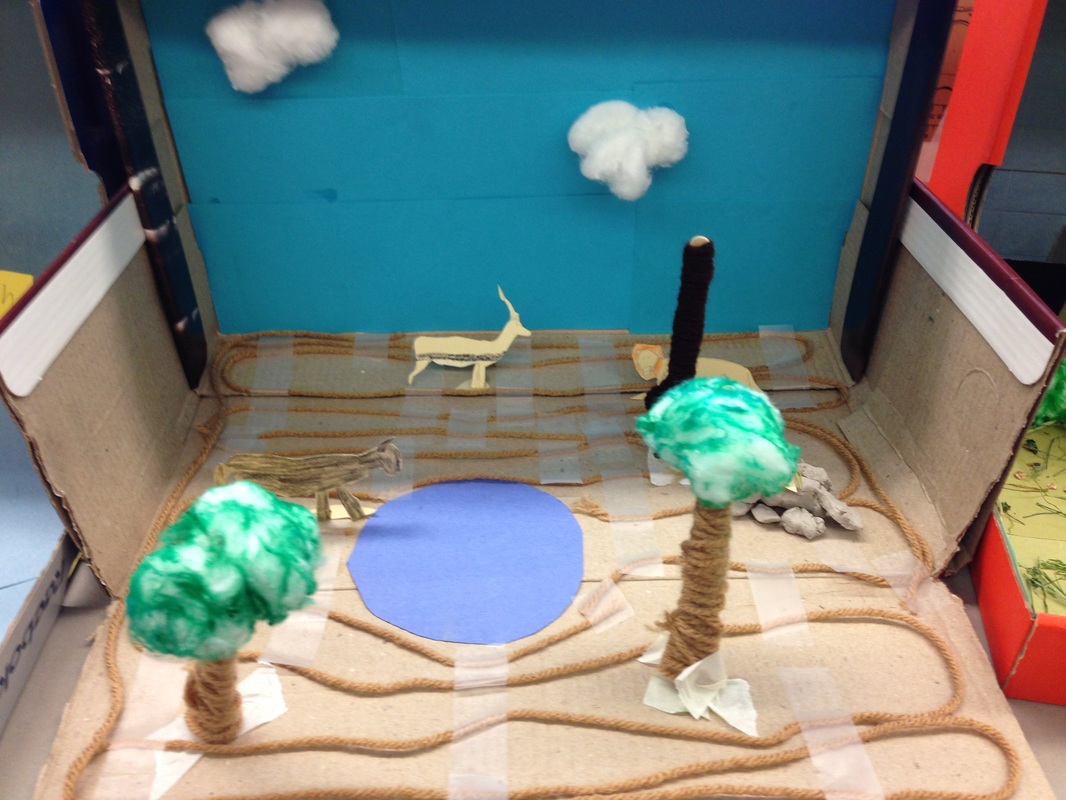
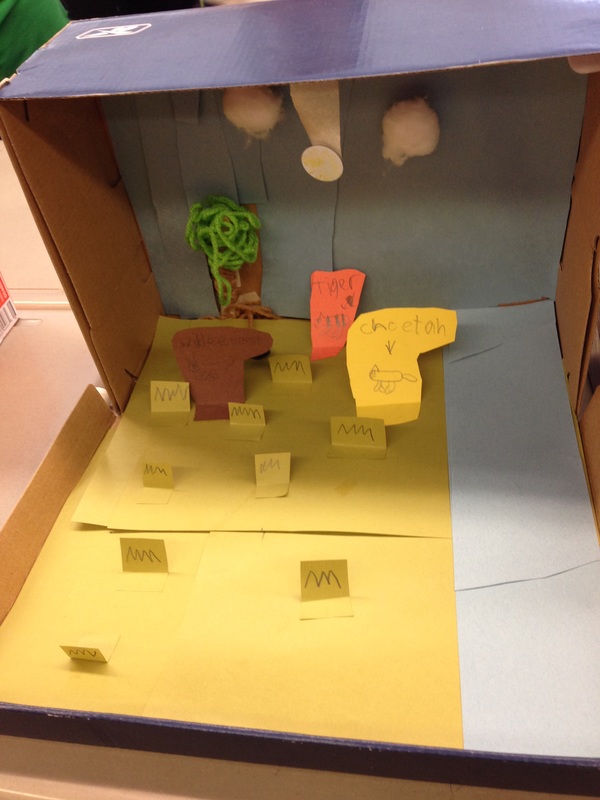
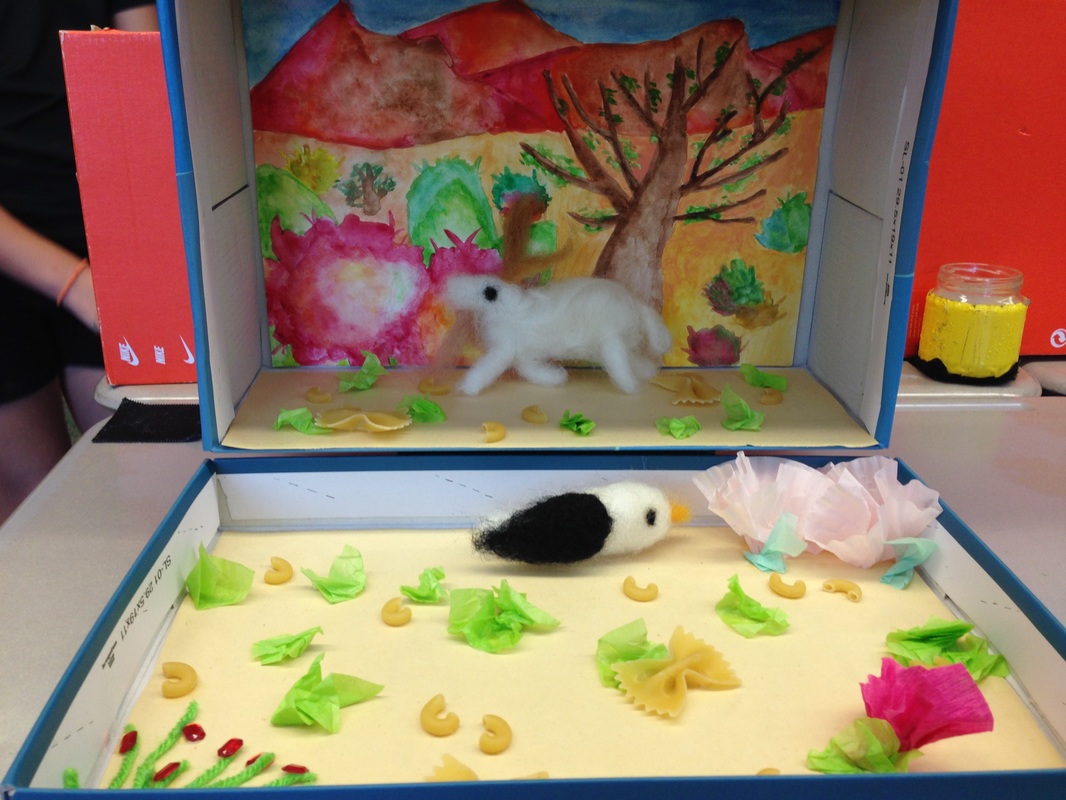
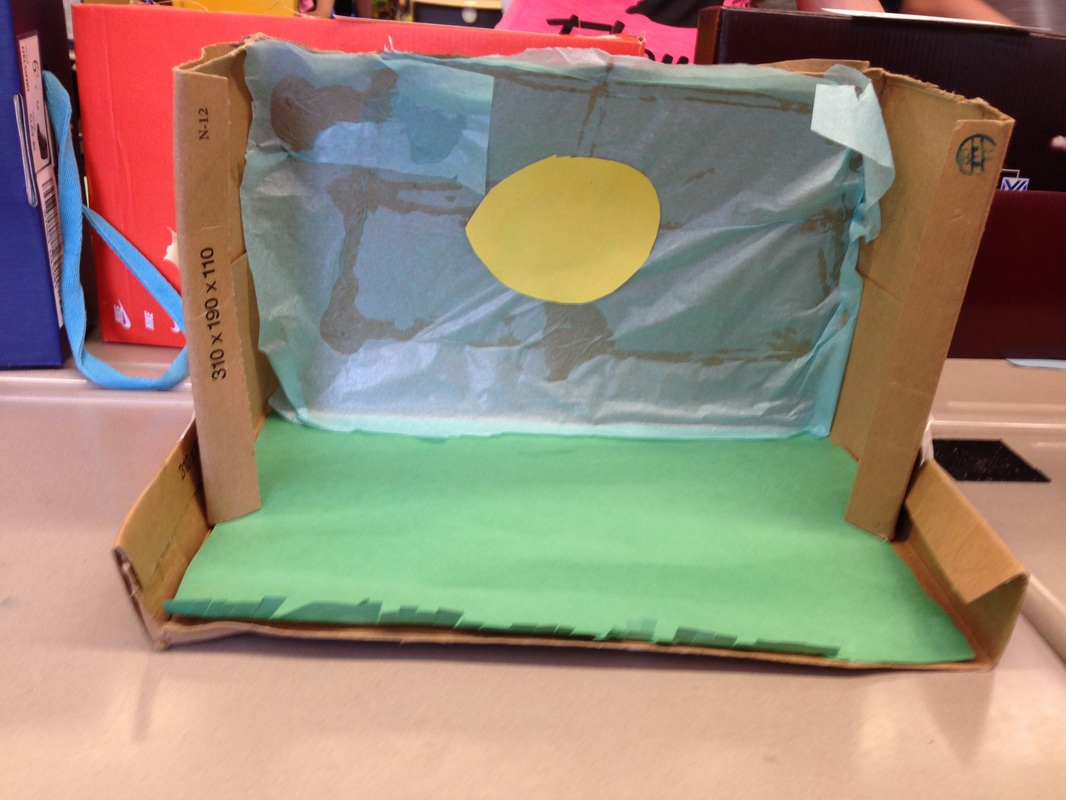
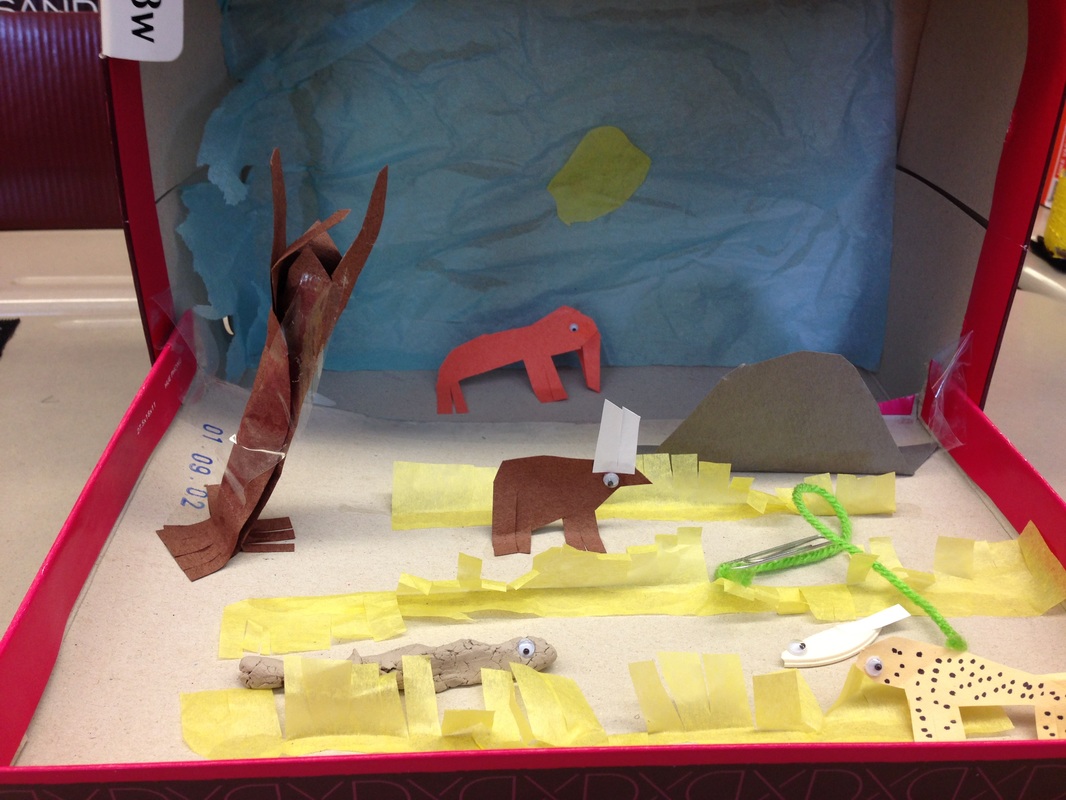
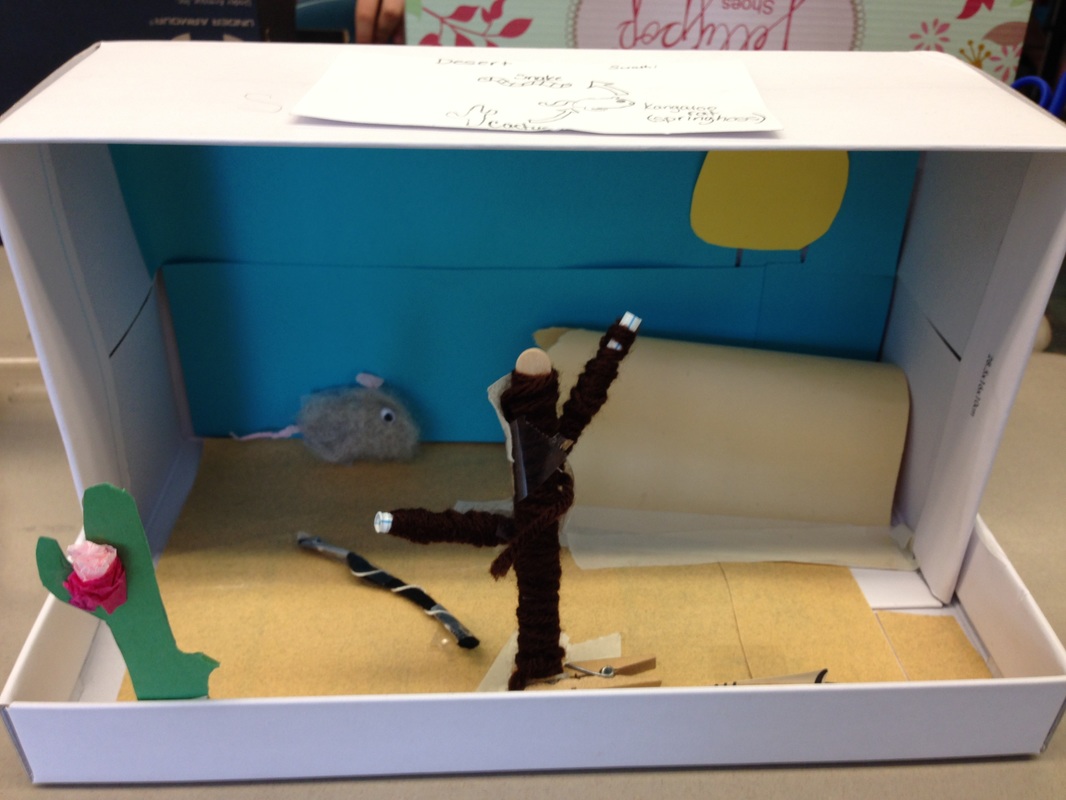
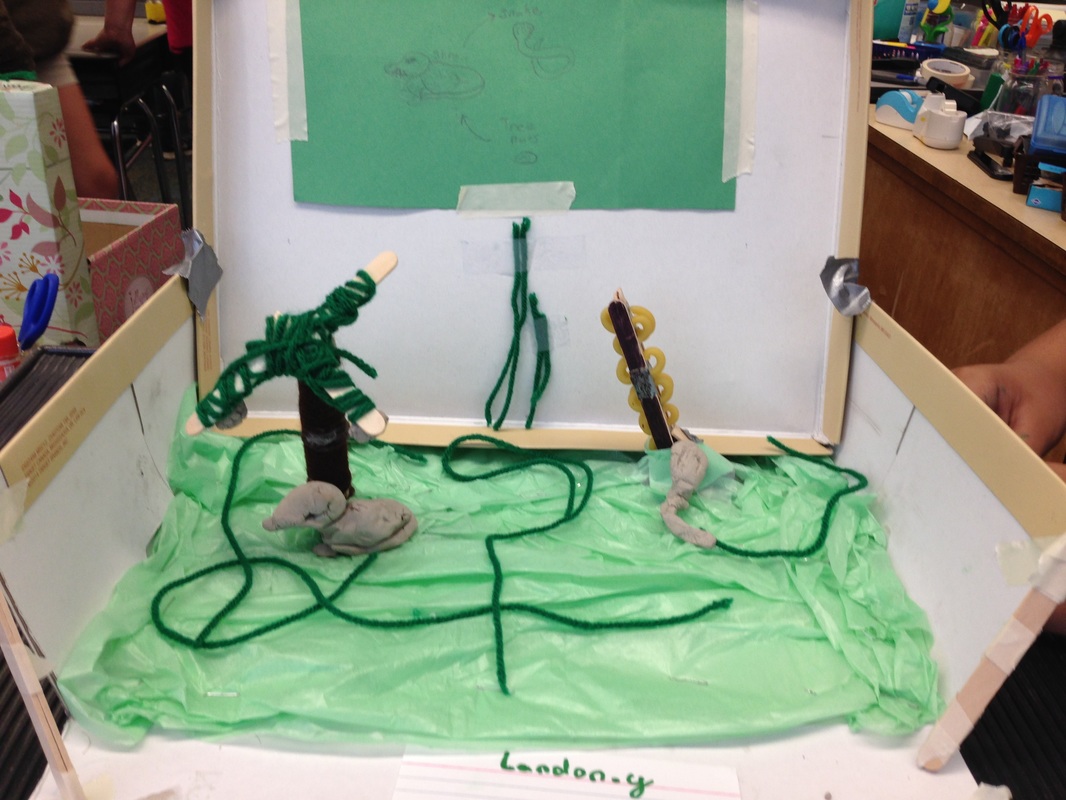
Students created dioramas in science class last week. The requirements were that they chose a biome included in the book (or researched another one they were interested in) and create a diorama with appropriate plants and animals. They had to include one food chain with at least three factors (one plant and two animals), but were allowed to include more. The projects were created at school using typical craft materials. It was great to see the students' creativity!
|
The Monterey Bay Aquarium in California has several live animal cams so that the public can view the animals any time during the day. I have linked those cameras below. There are also several Eagle Cams from around the country. Some of these have nests with baby eagles so that the public can watch them grow. Below are a few options.
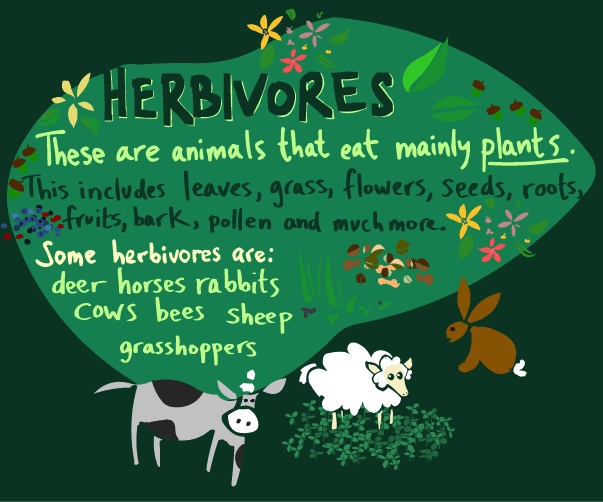
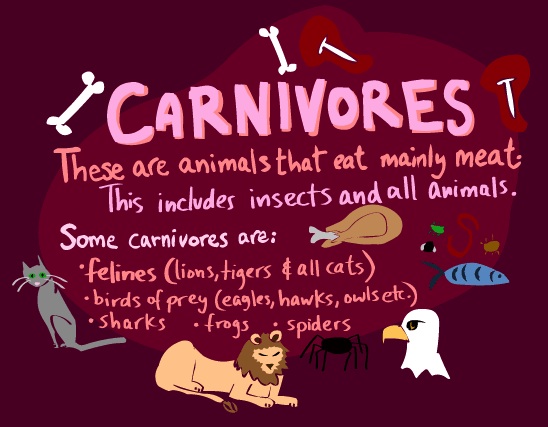
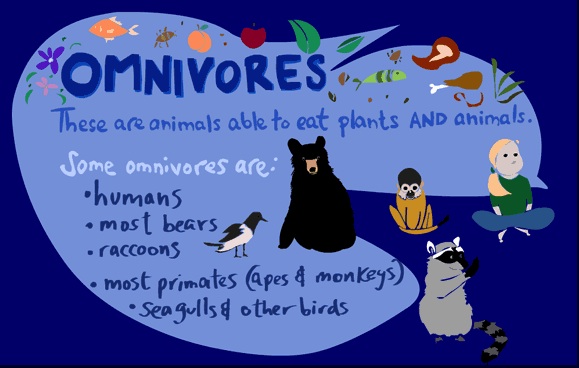
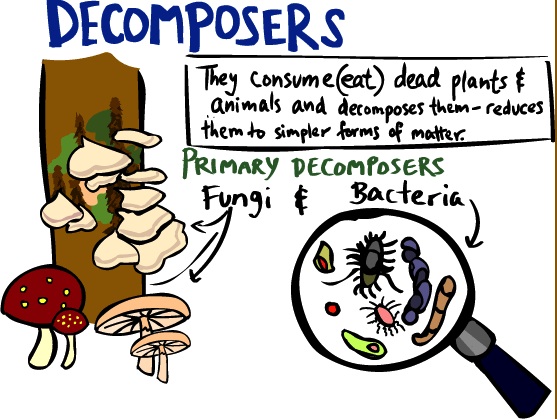
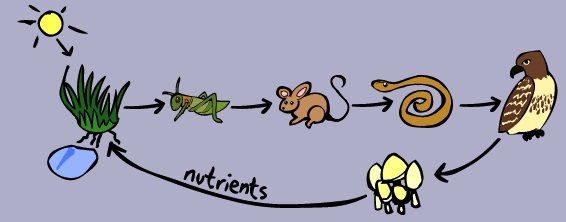
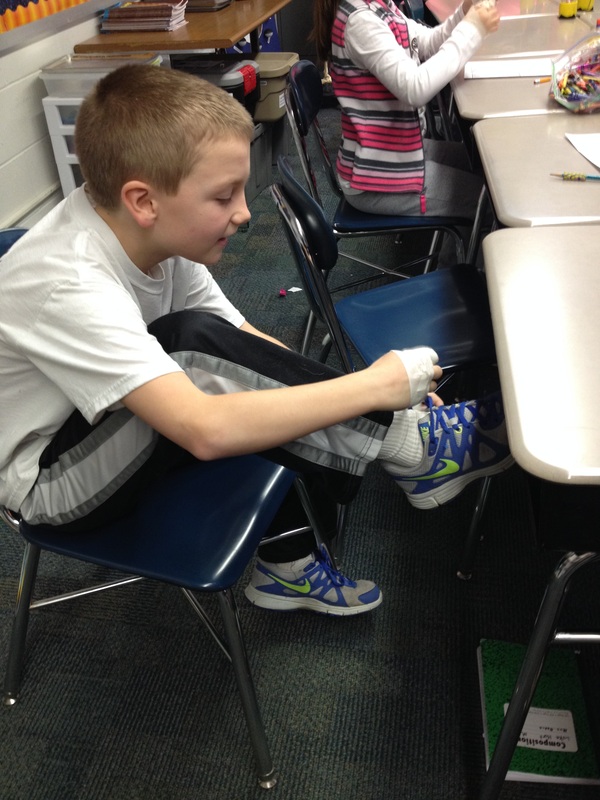
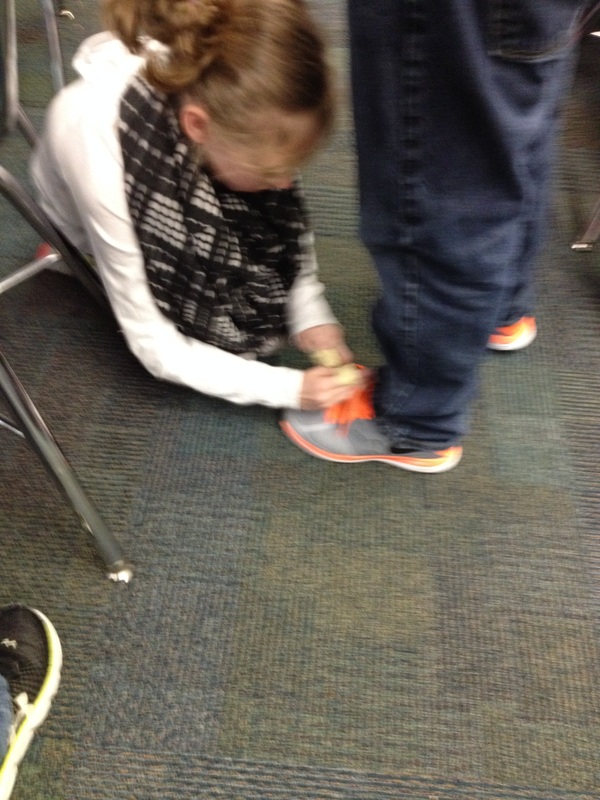
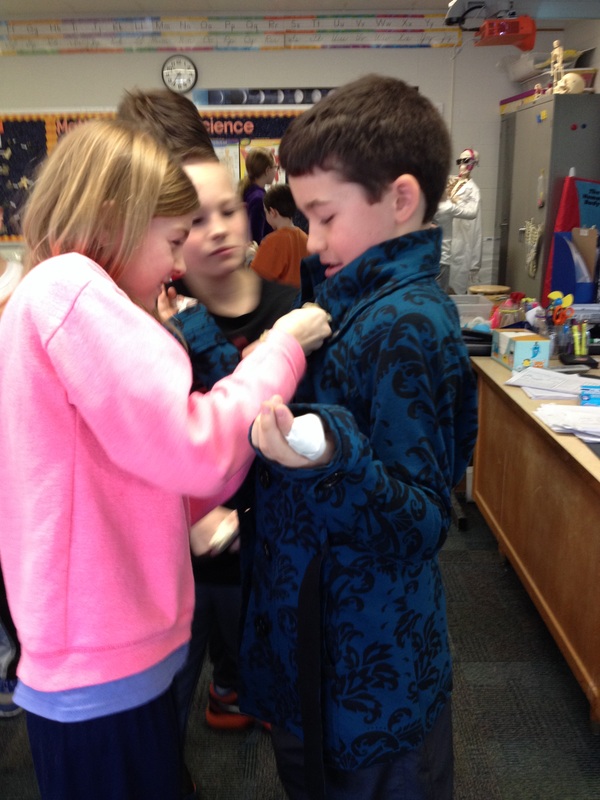
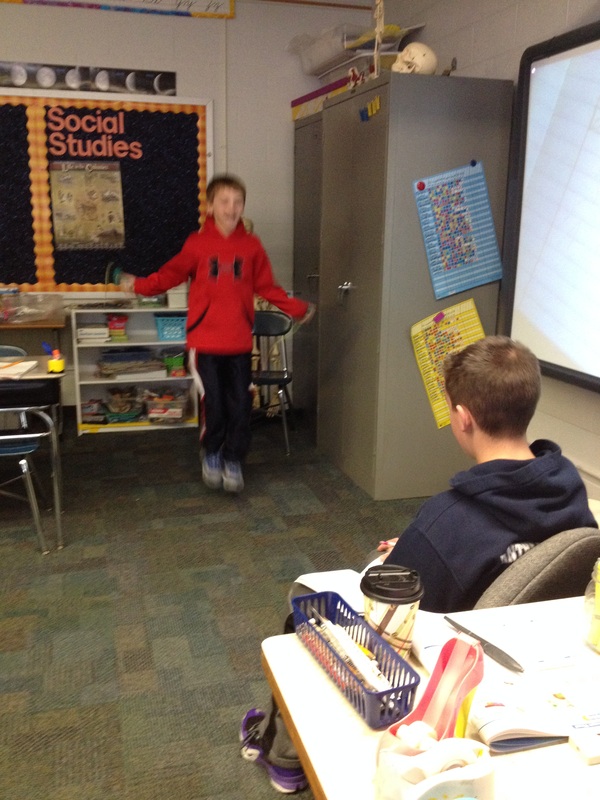
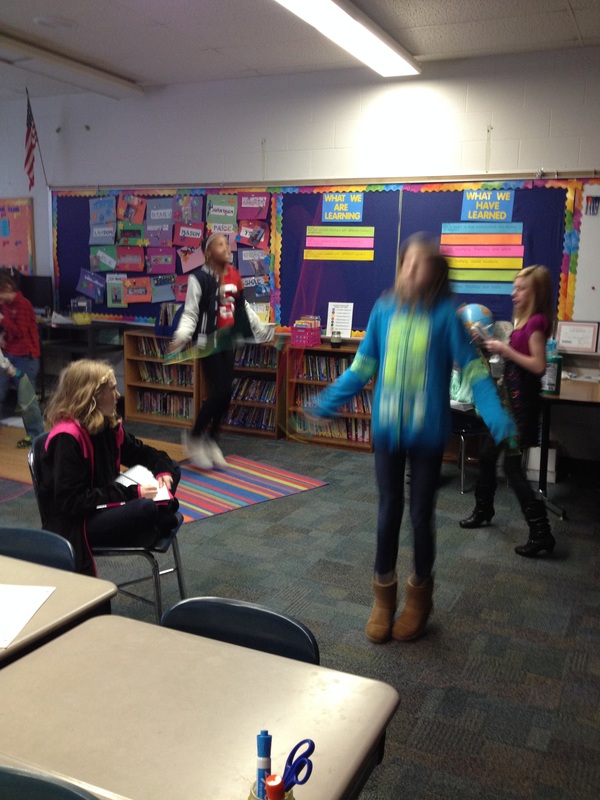
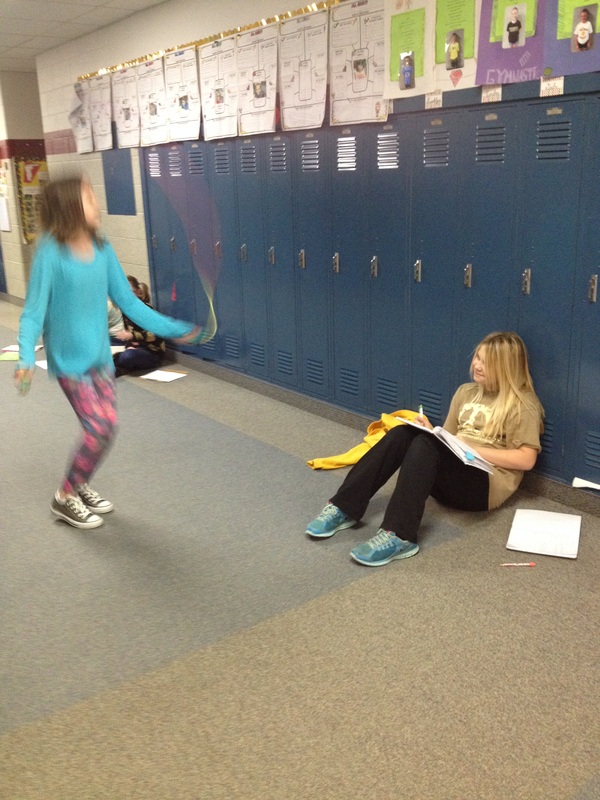
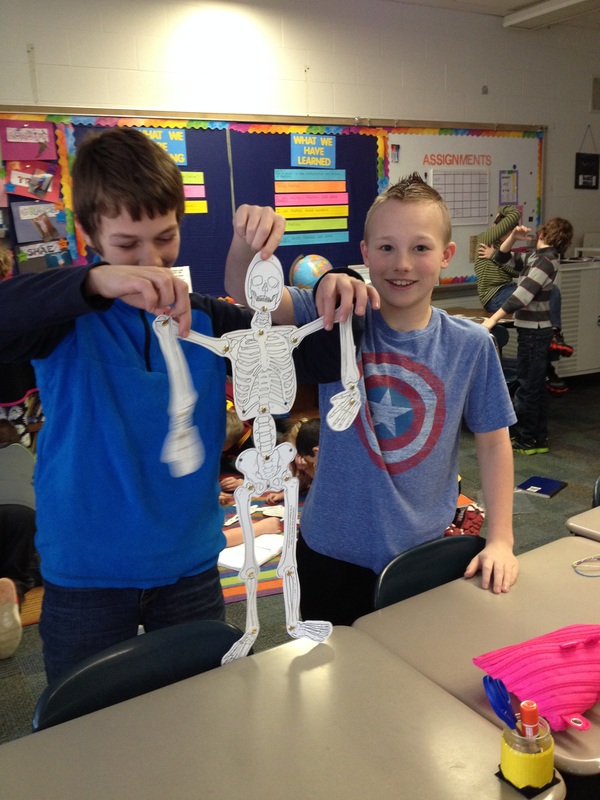
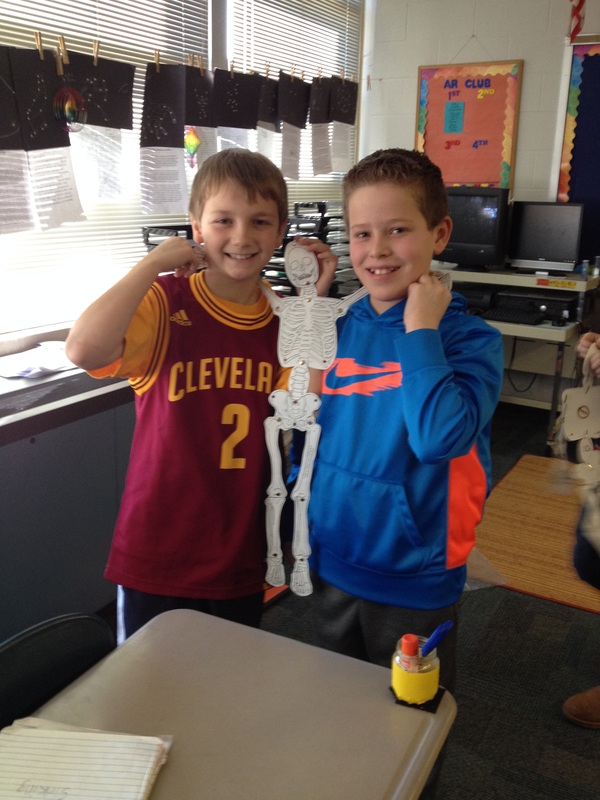
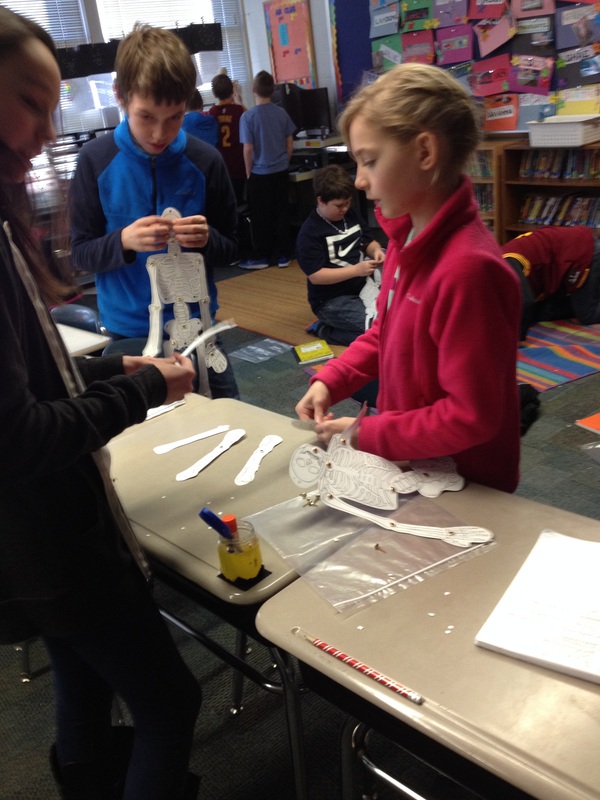
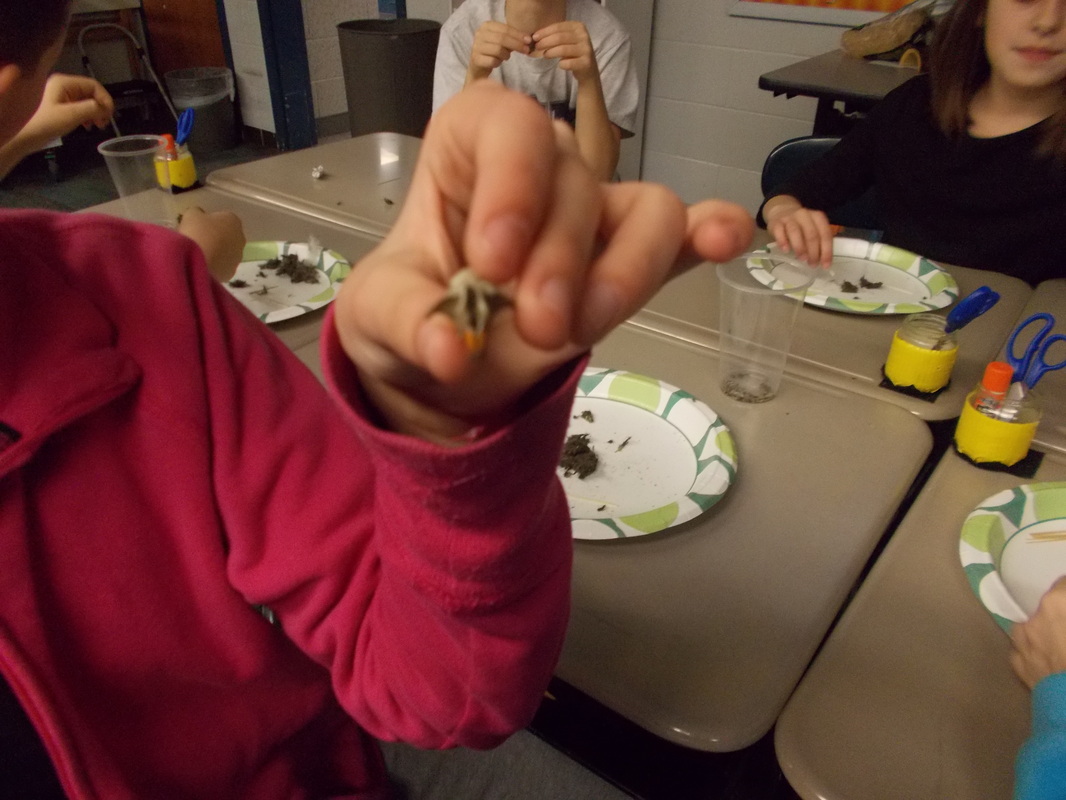
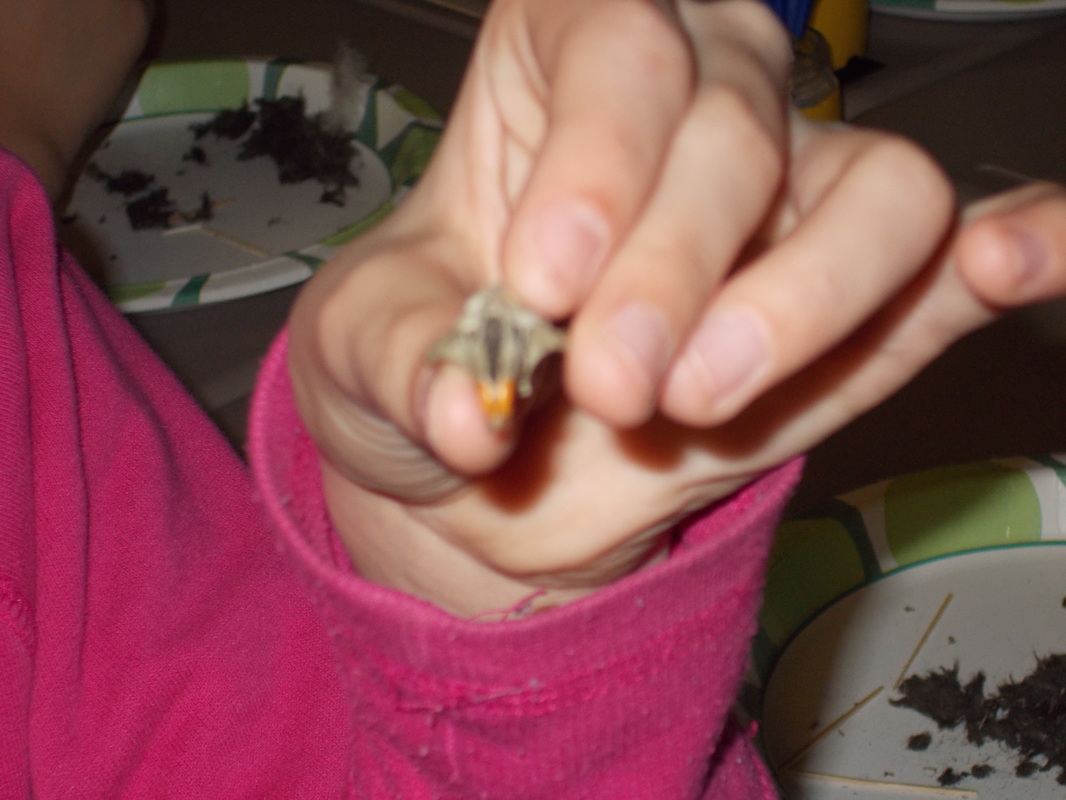
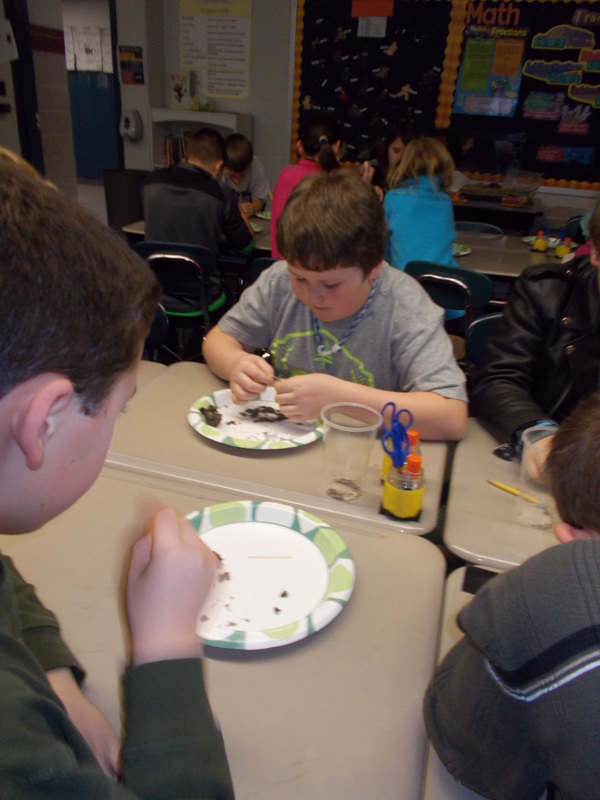
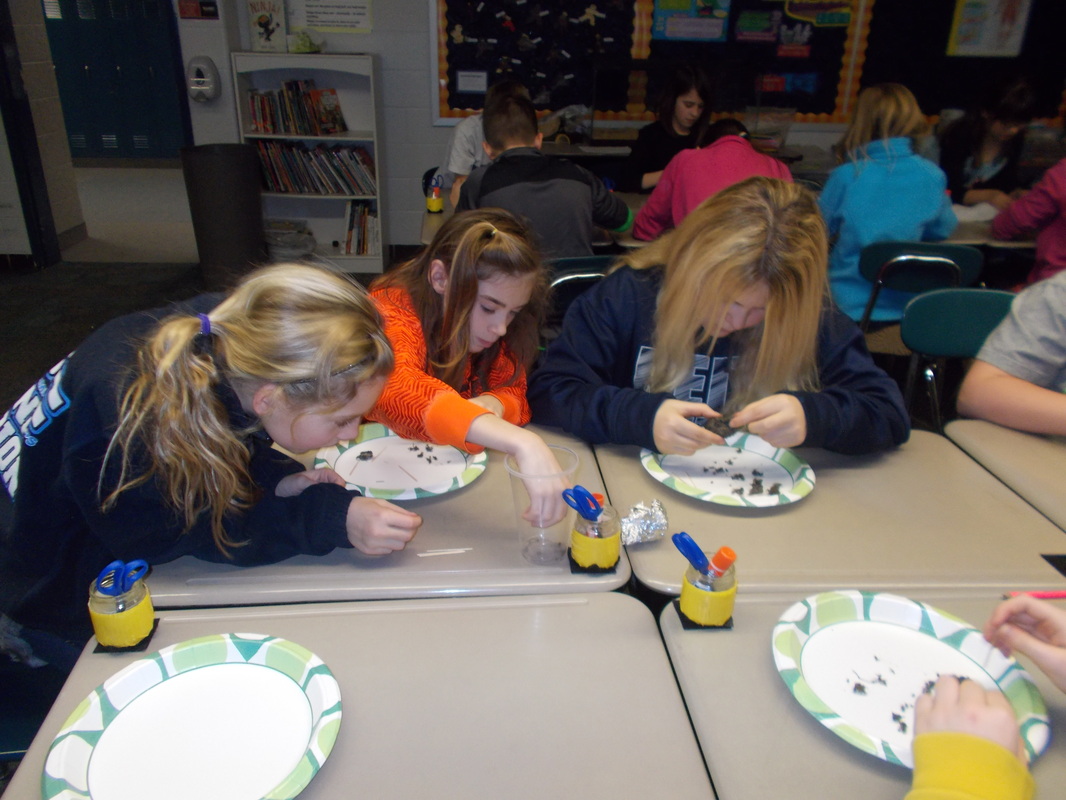
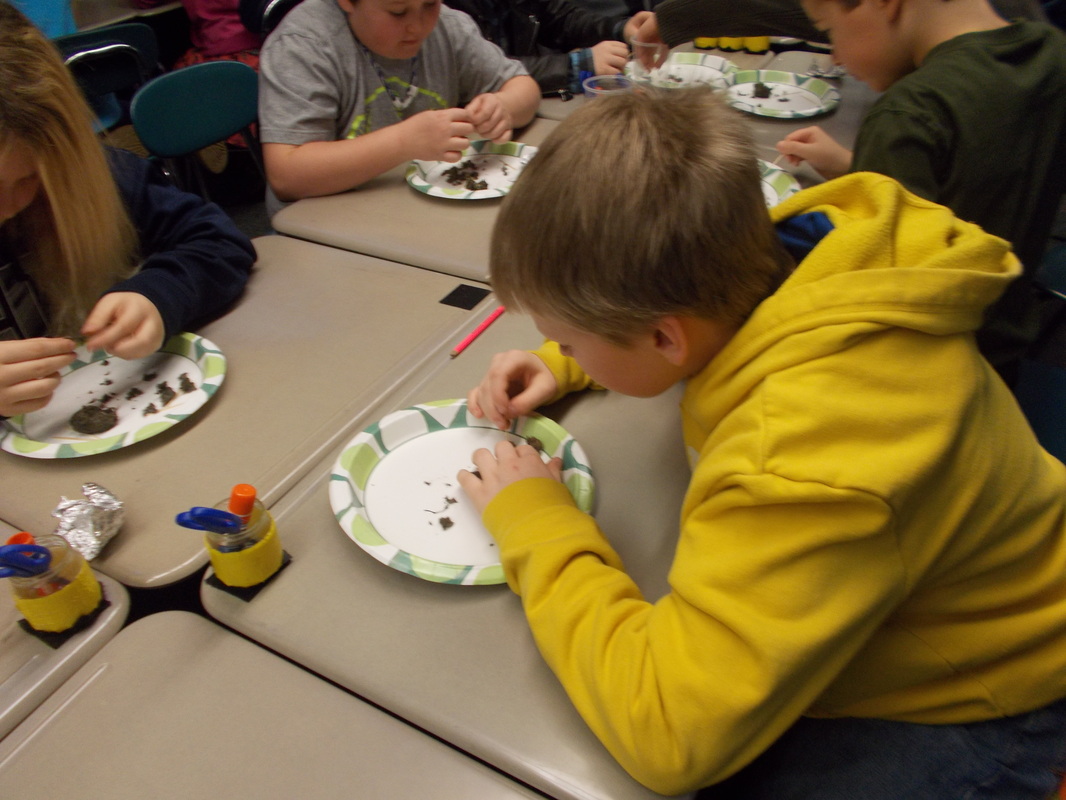
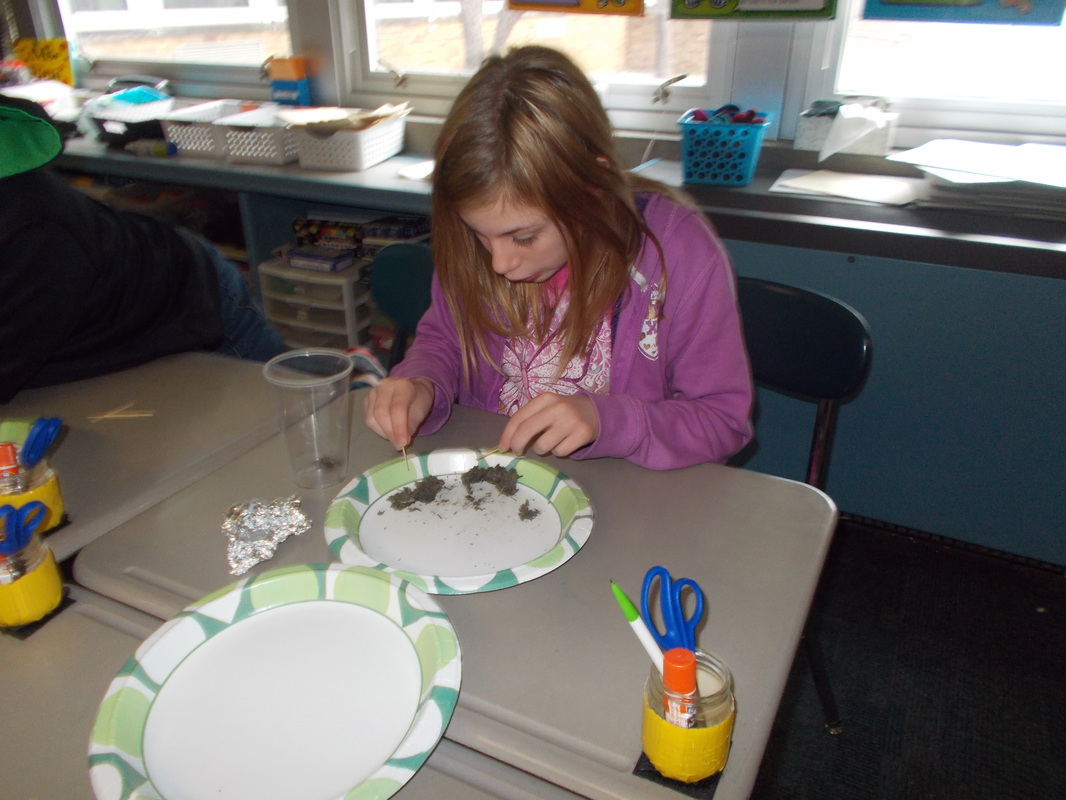
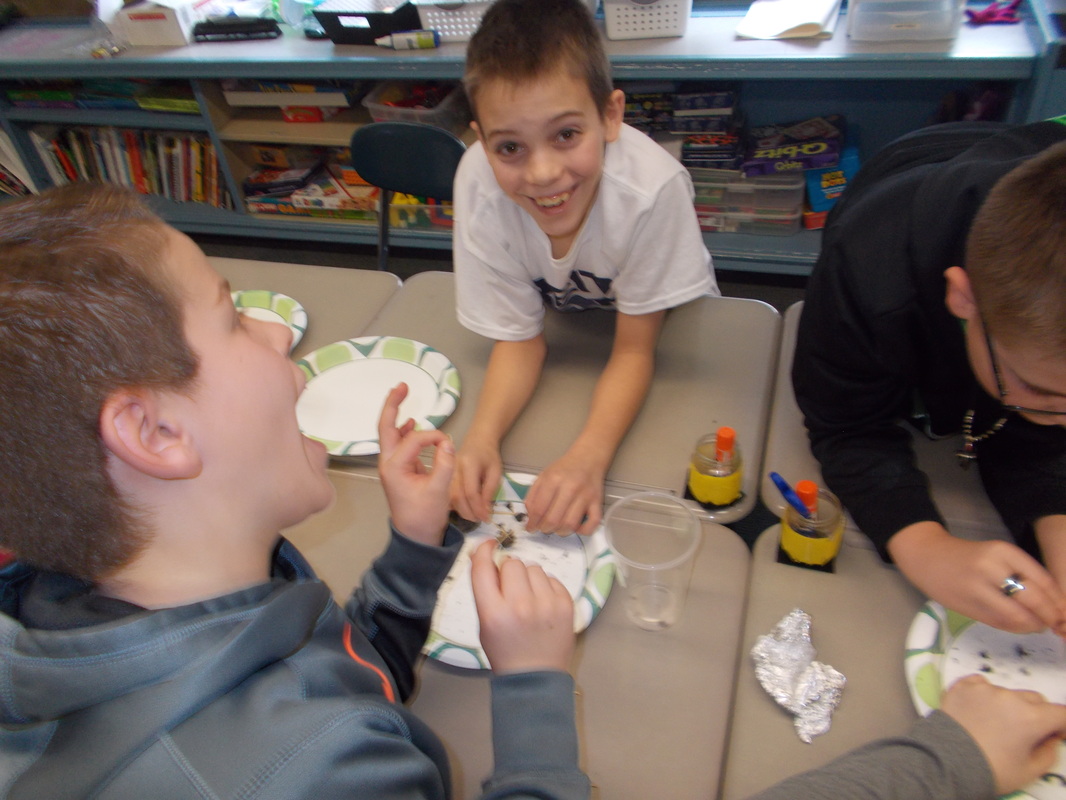
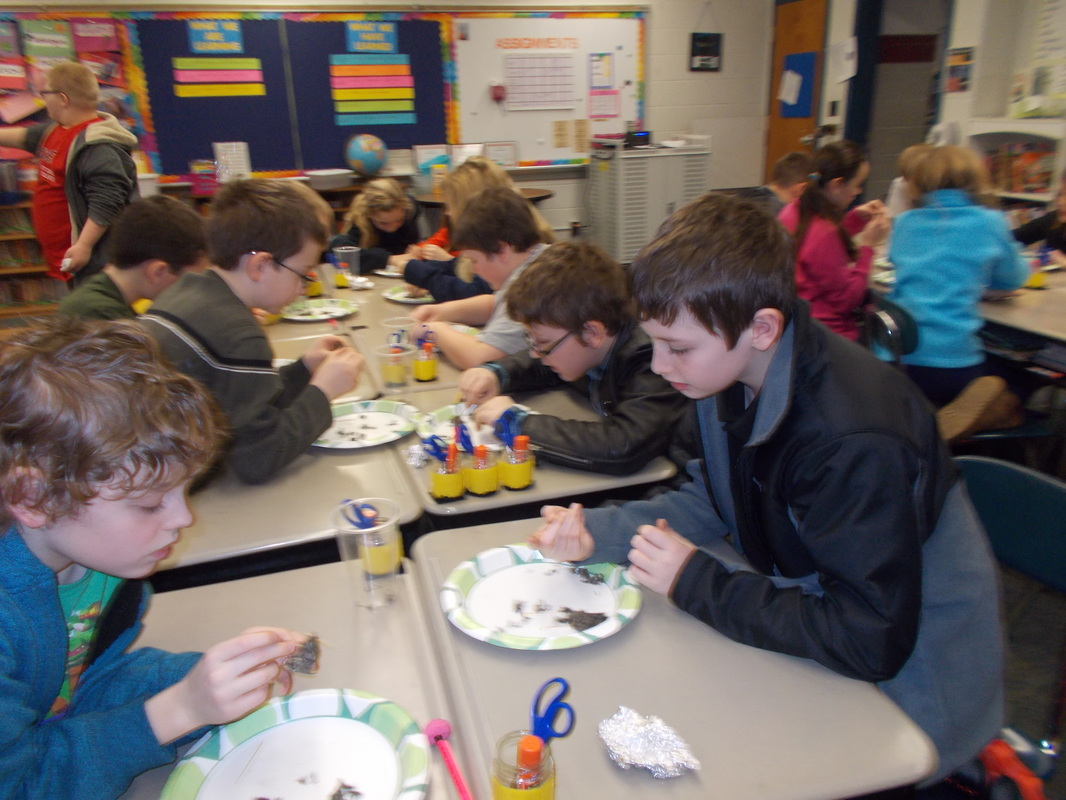
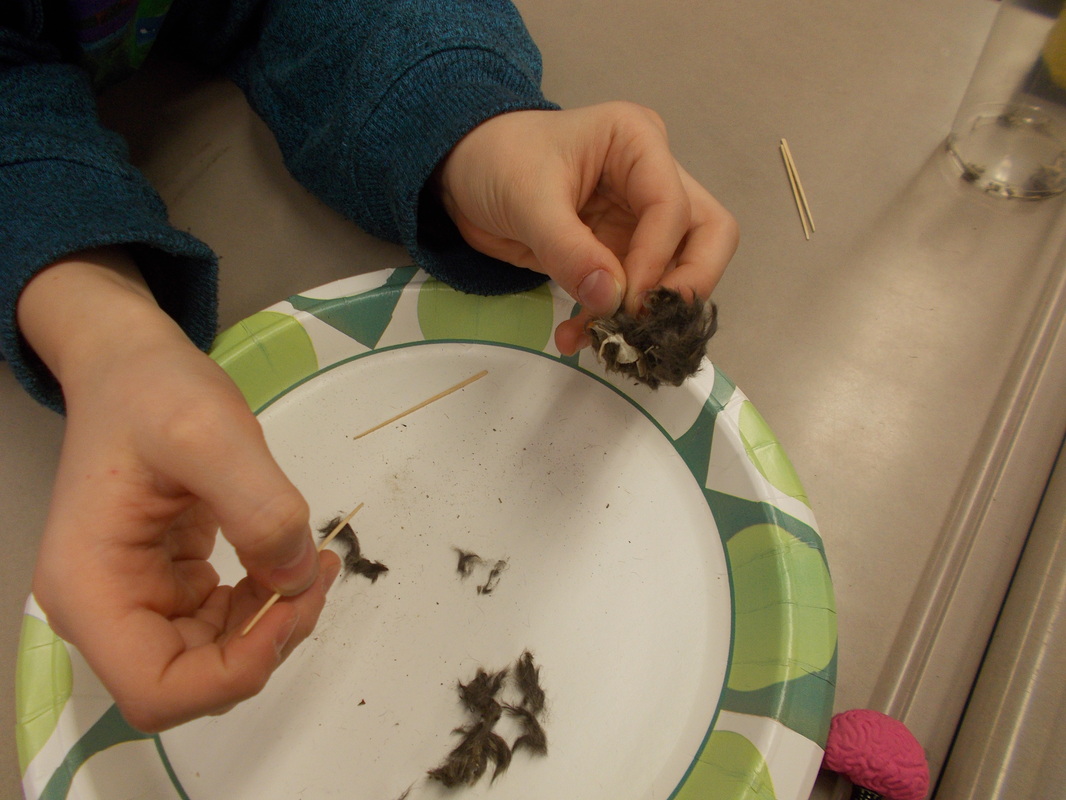
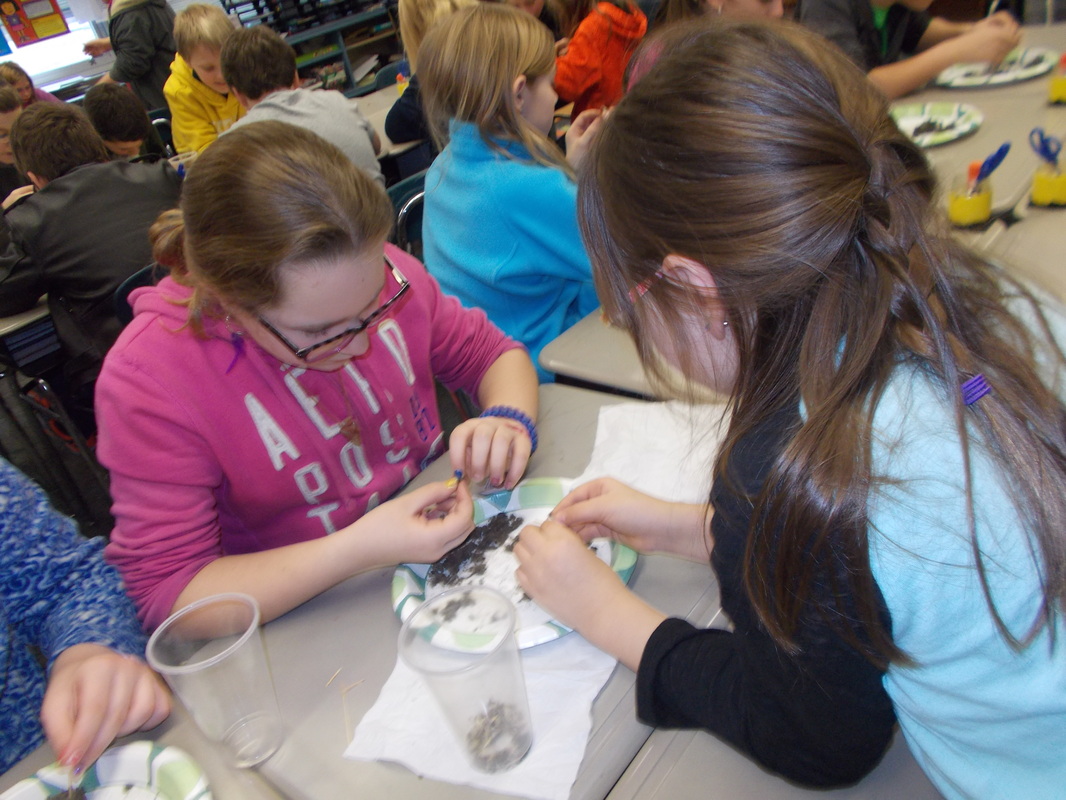
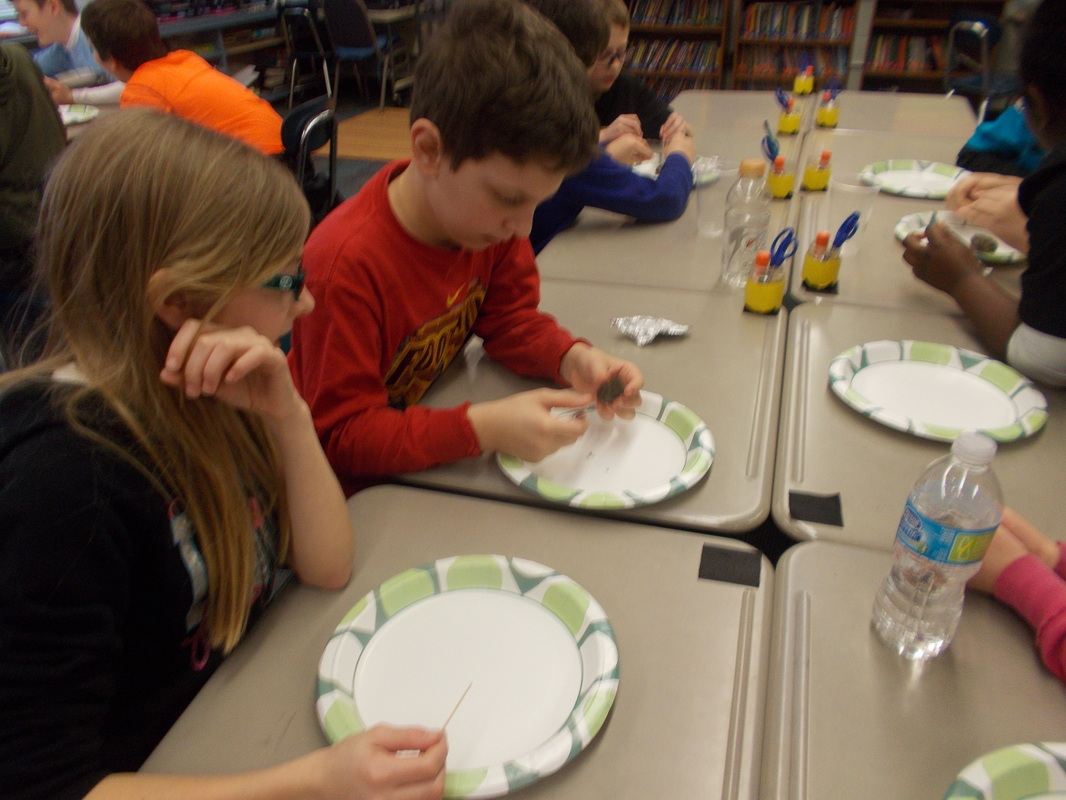
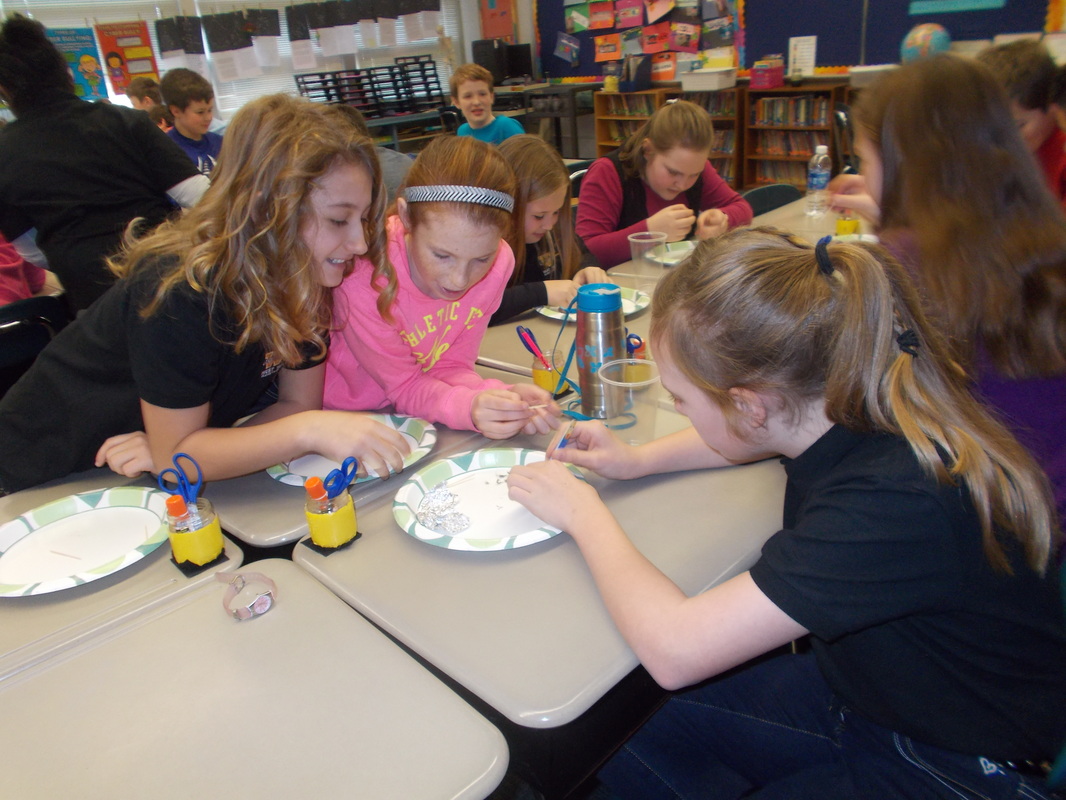
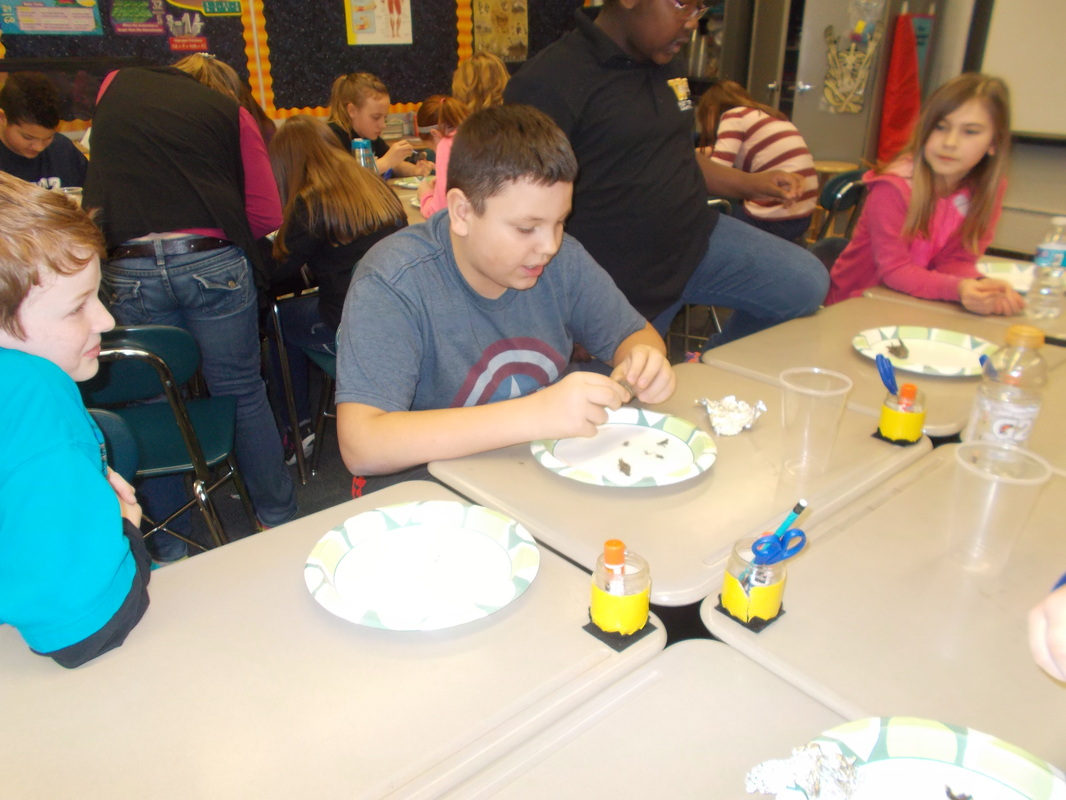
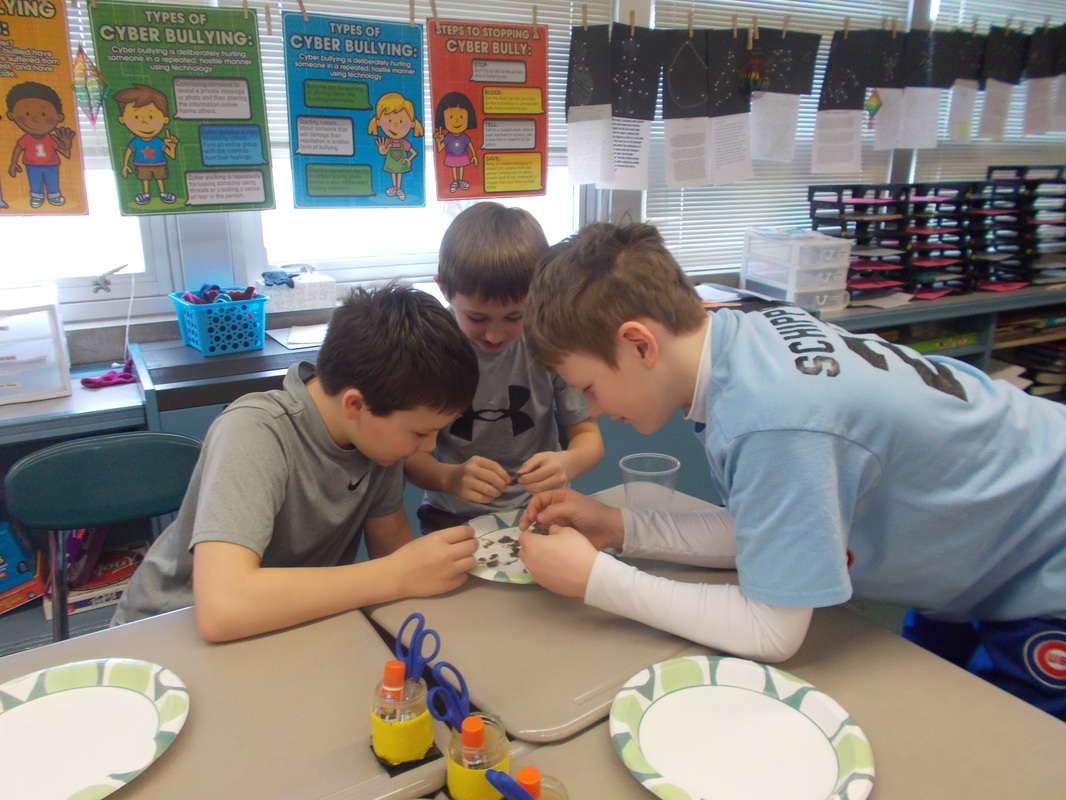
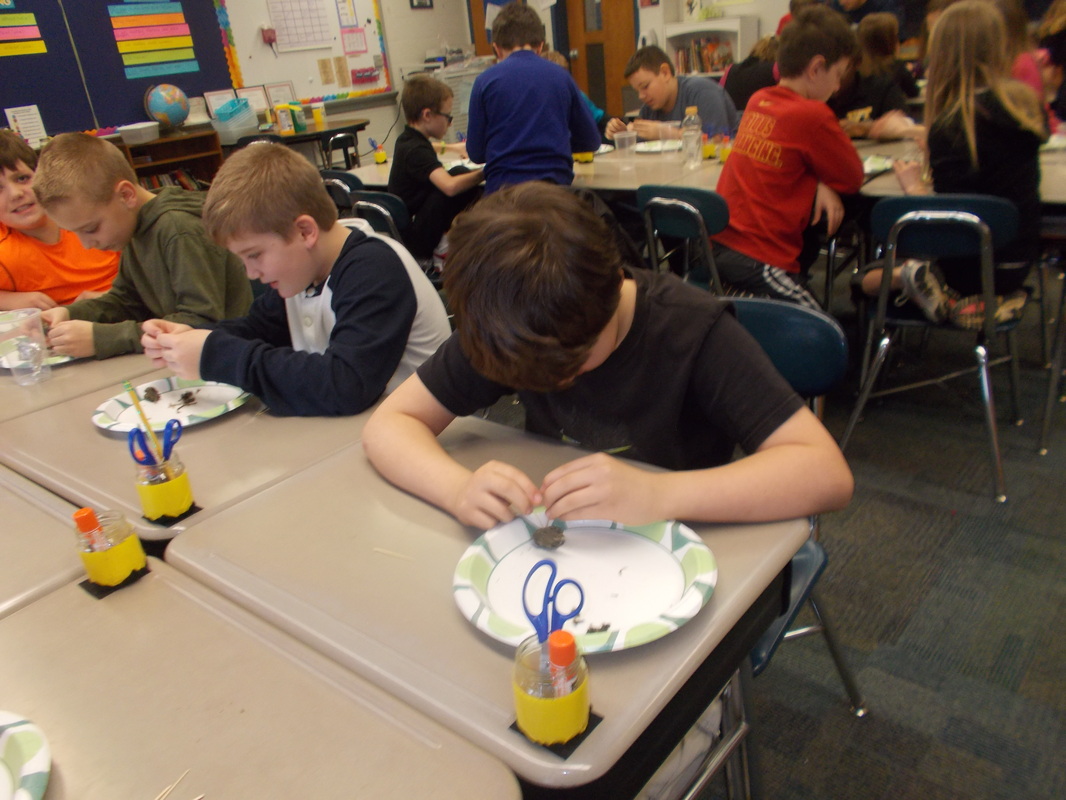
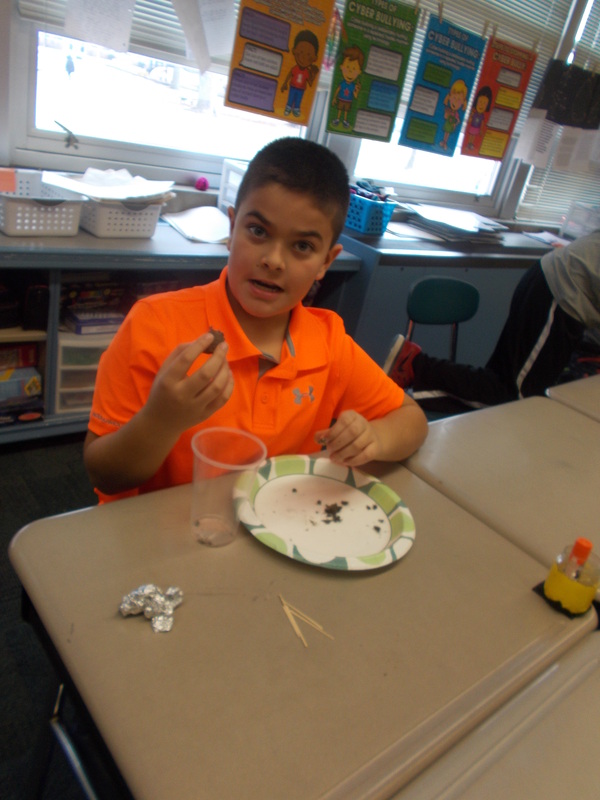
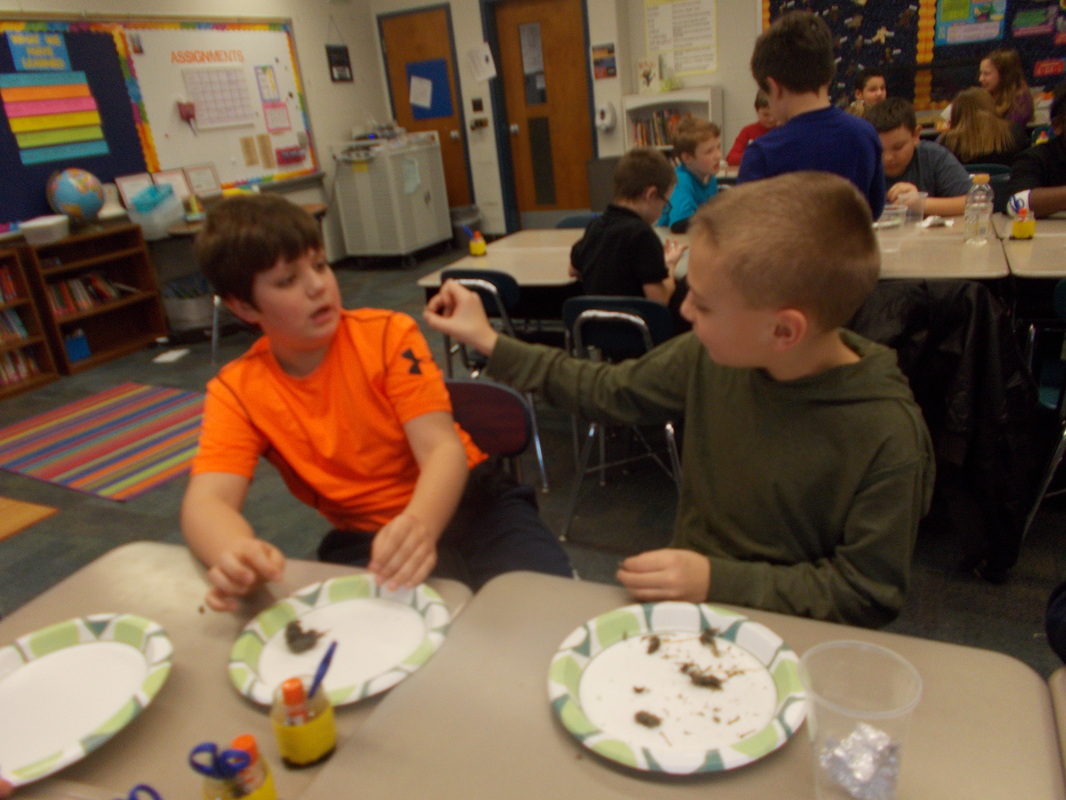
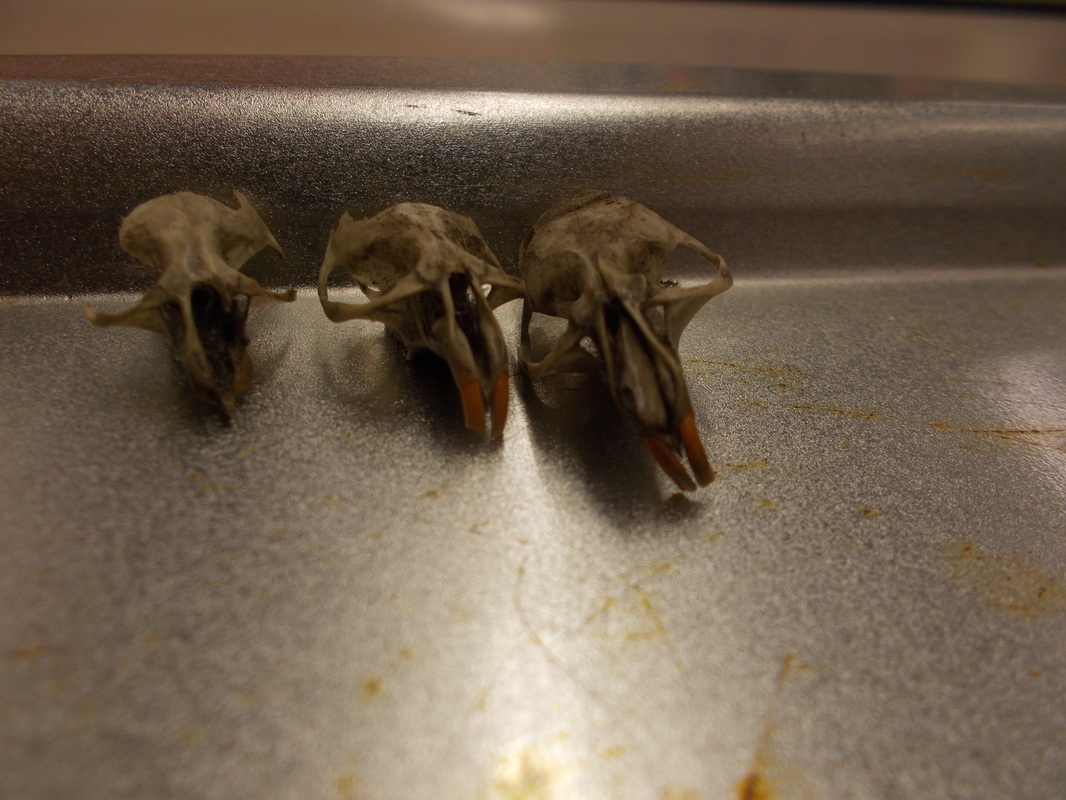
We have just started our last topic of the school year: Environments! This unit begins with very basic information and vocabulary, such as producer/consumer/decomposer, biotic/abiotic factors, herbivore/omnivore/carnivore, and predator/prey. Once students are comfortable with the vocabulary terms, we will move to food chains and food webs. Throughout this unit, we will be discussing various biomes around the world. There are slightly different biomes based on where the information is coming from, so we will use the ones in the textbook for our current unit. One very important part of this unit is the importance of each factor (plant or animal) within that single environment, and the effects of even one factor being removed due to disease, hunting, or similar situation. We will also spend time talking about animal adaptations, which allows us to watch some amazing videos that show another side of animals. Many are way more intelligent than they may seem! We watched a video on decomposers early in this unit because that was one that the students seem least familiar with. Many were confusing decomposers with scavengers. You can view the video here. Here is another video that the students will watch about predator and prey interactions in the ocean. This link gives a thorough overview of the initial part of this unit, and this link will take you to a game that helps students identify producers, consumers, and decomposers. To start this section, the students watched a partner jump rope, and recorded which bones and joints they were using. Later, they had to put together skeletons, and they did a good job! We also did an activity to figure out how much people rely on thumbs for everyday tasks, such as turning a doorknob, buttoning or zipping up a jacket, or picking up a cup. They were given "homework" to try a few things at home without using their thumbs. Several students took the challenge then told us about it the following day. The students have been working on reassembling rodent skeletons from owl pellets. Here are some pictures of the students working in class! The science unit for the third grading period will be the Human Body. More specifically, we will be studying the musculoskeletal system: the bones, muscles, joins, and coordination. The first lesson consisted of the students jumping rope, and then determining which bones, muscles, and joints are involved in those movements. They will count the bones in the body next, and then begin learning the proper names of the main bones in the body. Later in this section, they will dissect an owl pellet, and then reconstruct the skeleton of the rodent. 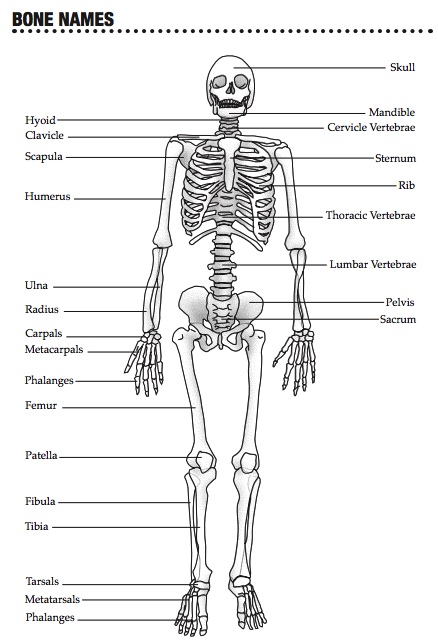
A lot of our daily life depends on this close star that we call the Sun. When paired with the rotation of the earth and the revolutions around the Sun, we get days and nights, sunrises and sunsets, and seasons. 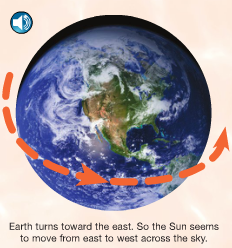
We all know what a shadow is, but how many kids stop to think about what causes them? And how do shadows change over the course of a day? or a year? These questions can also be asked of day and night, of sunrises and sunsets, and of seasons. That's the main focus of this first section. Using a combination of a globe, a light bulb, random objects in the classroom, and observations out our windows, we have been discussing these questions. 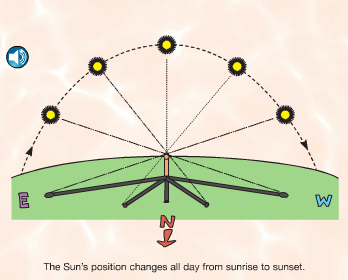
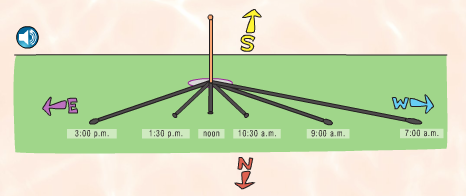
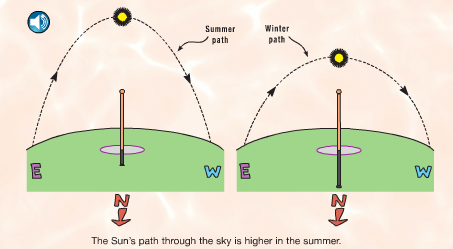
Photo Source: www.FossWeb.com Student e-book
 We started a new science unit for this grading period: Sun, Moon, and Stars. The first topics of focus are day/night, sunrise/sunset, and shadows, and how the rotation of the earth is related to each of them. Over the course of the grading period, we will also cover the phases of the moon, the seasons, and constellations.
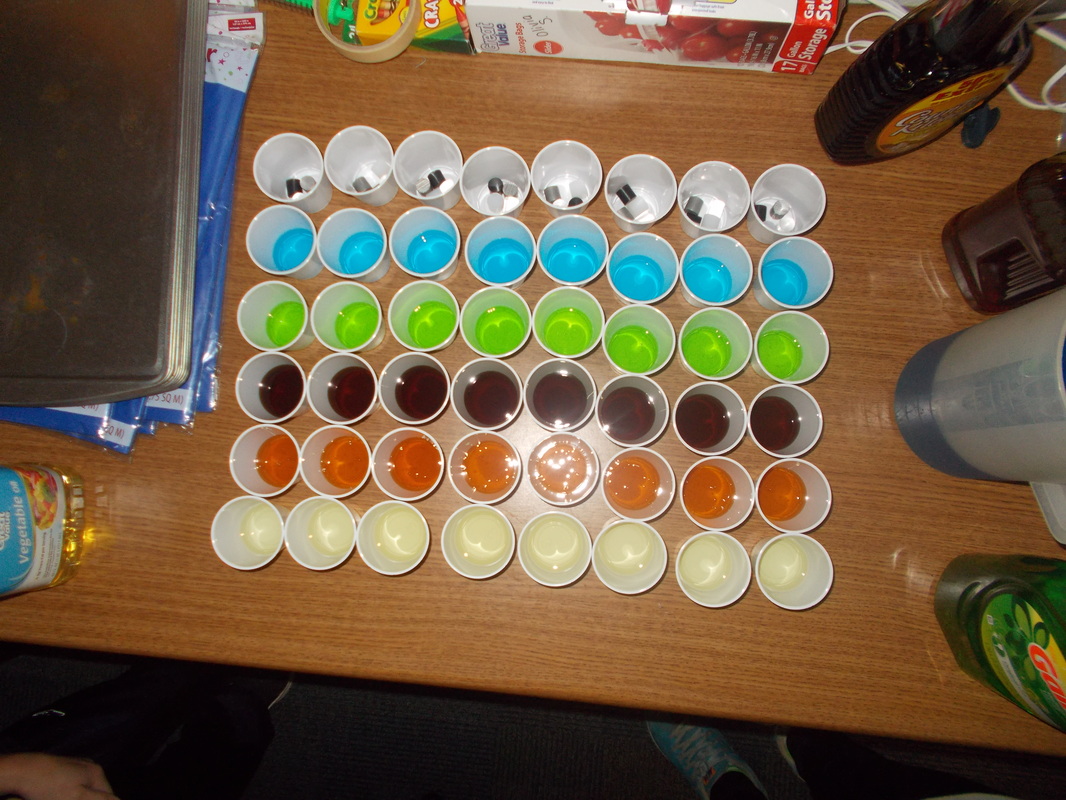
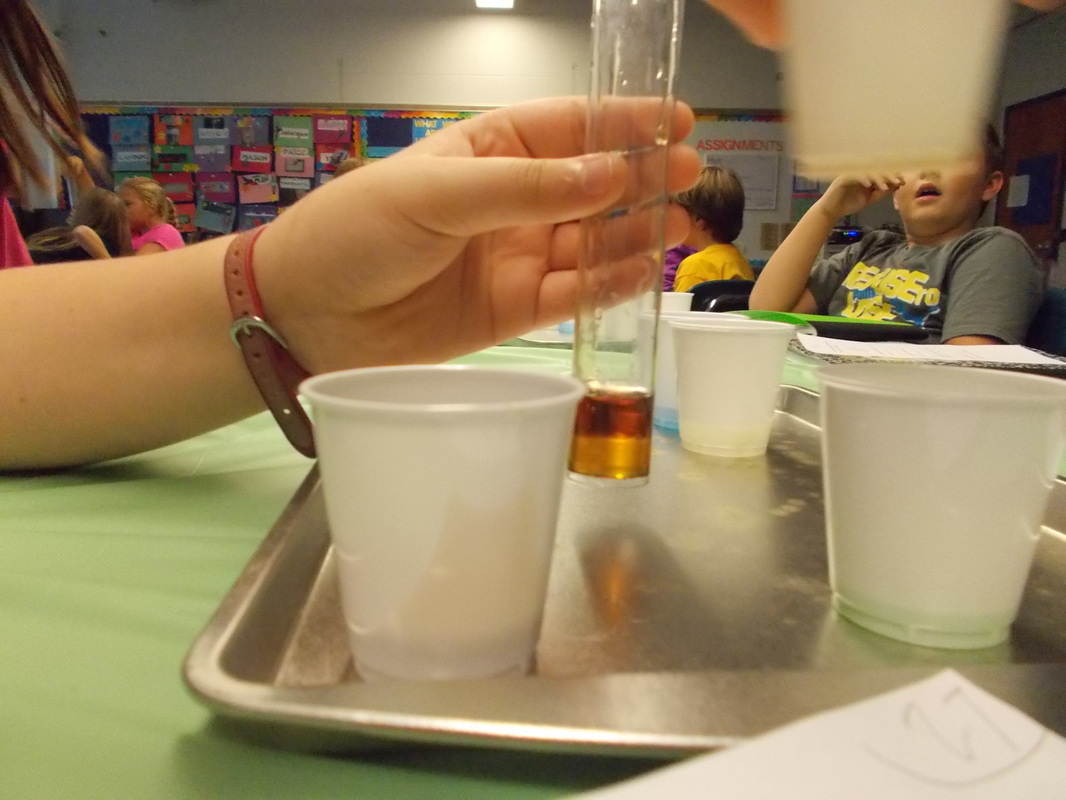
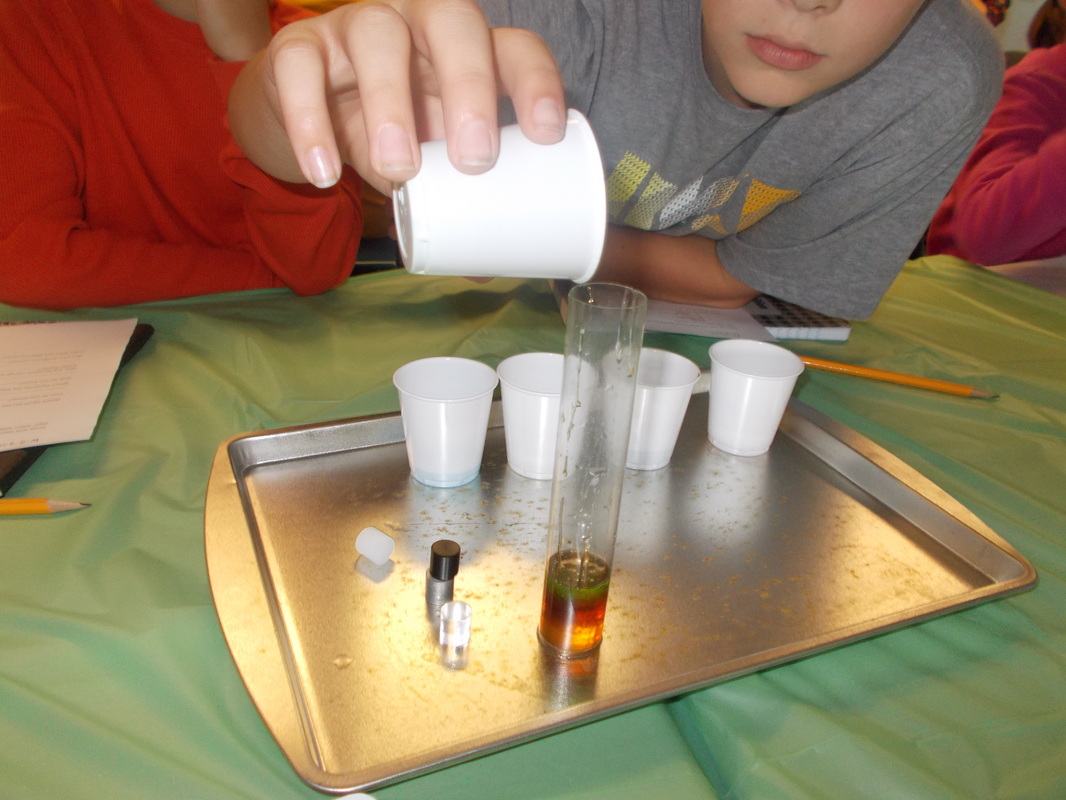
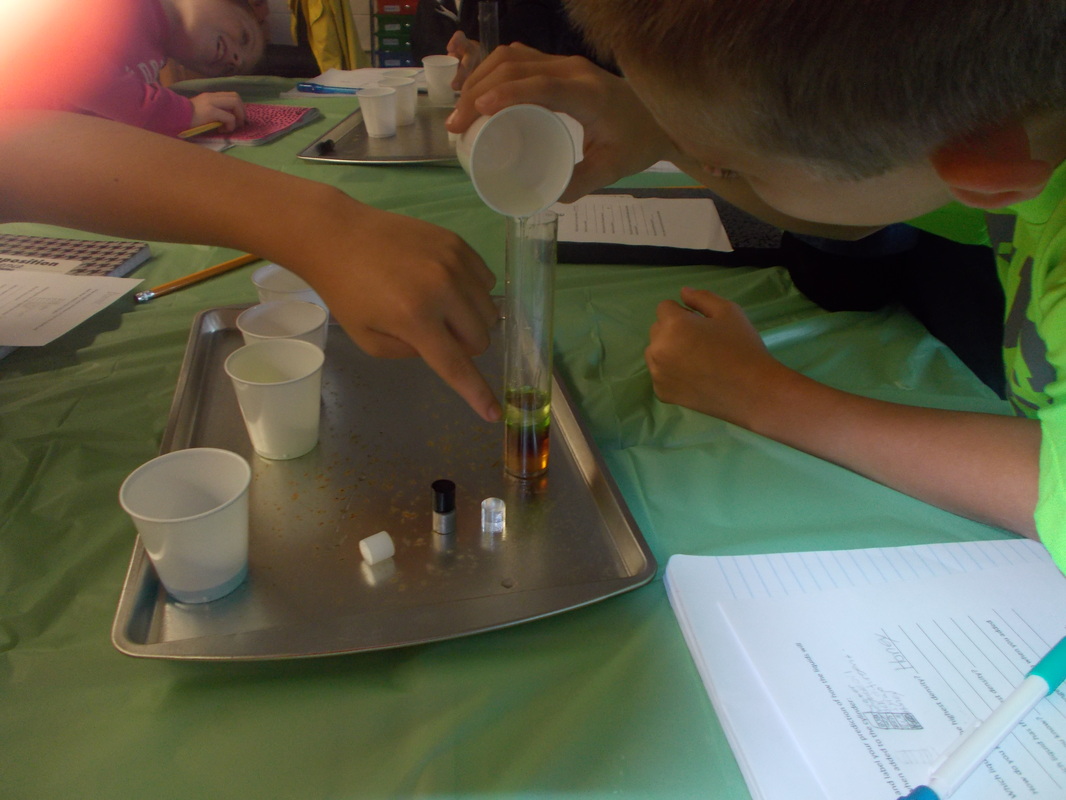
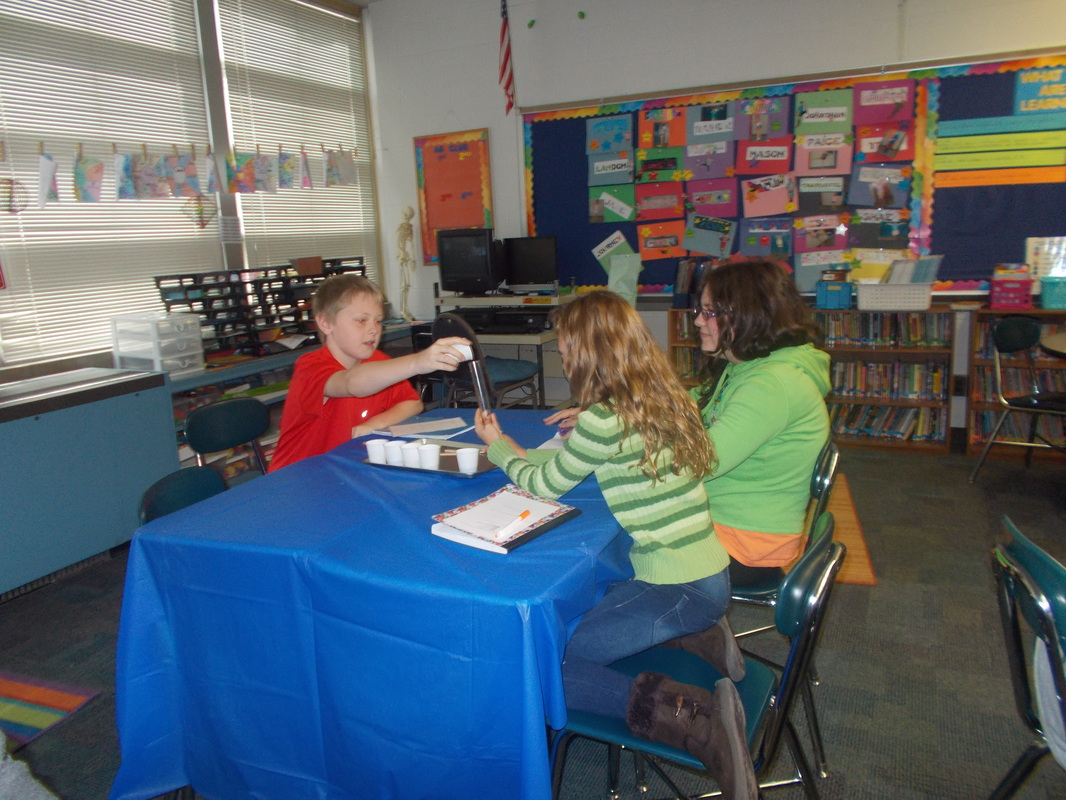
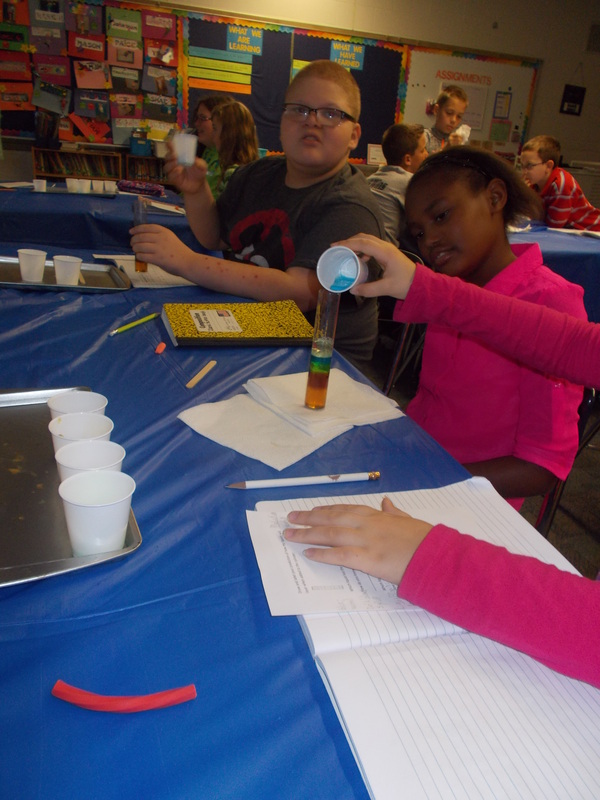
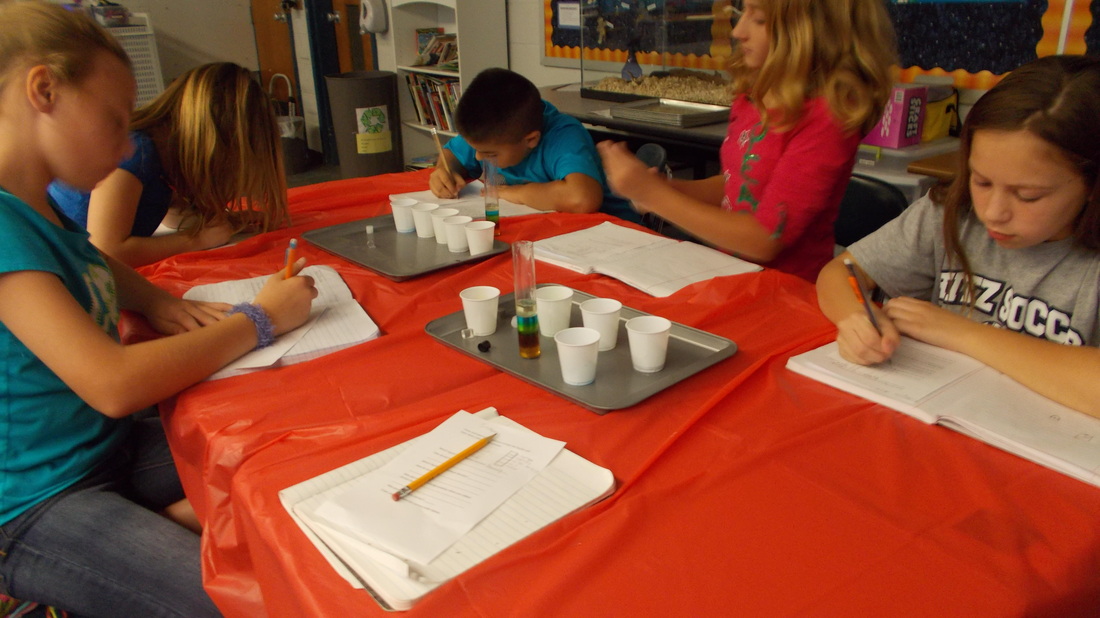
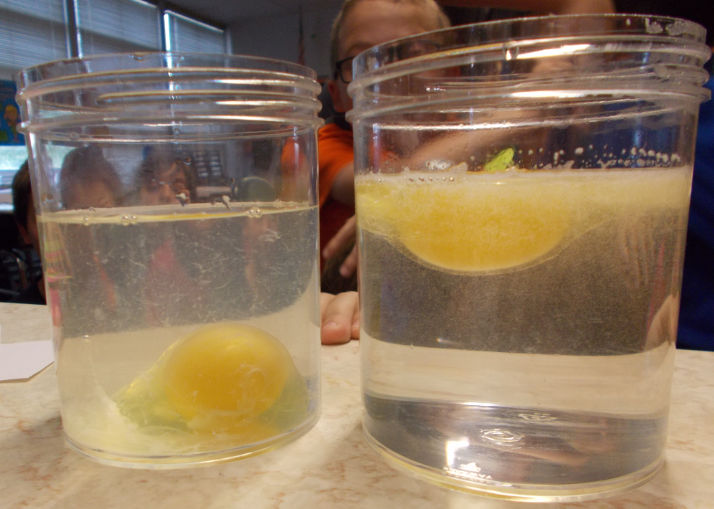
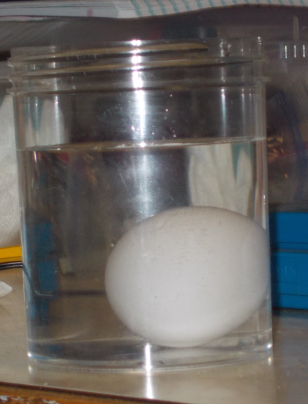
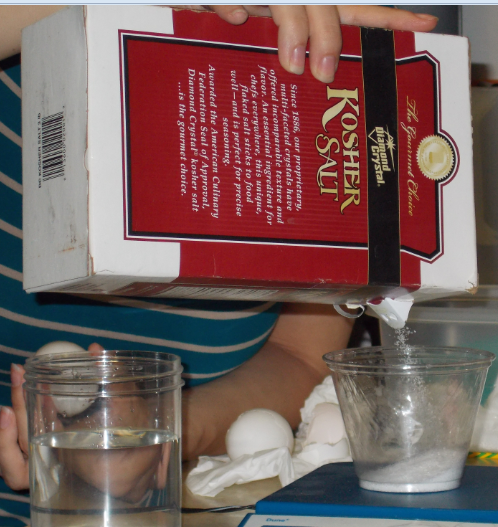
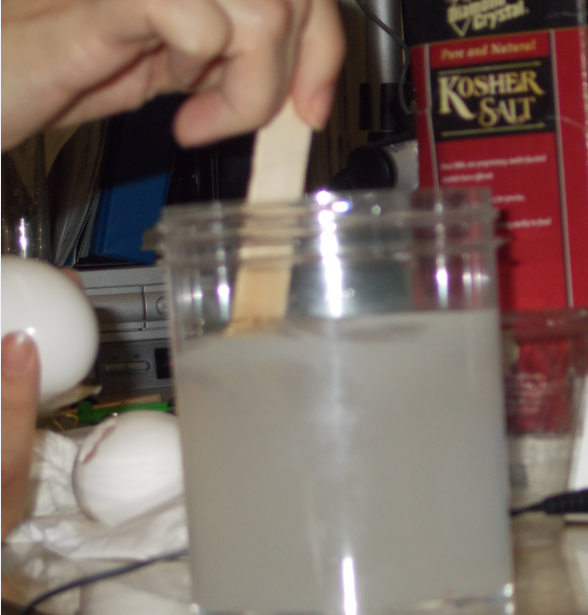
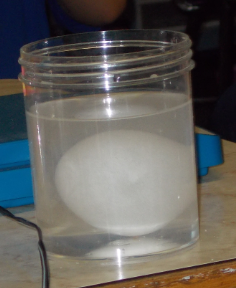
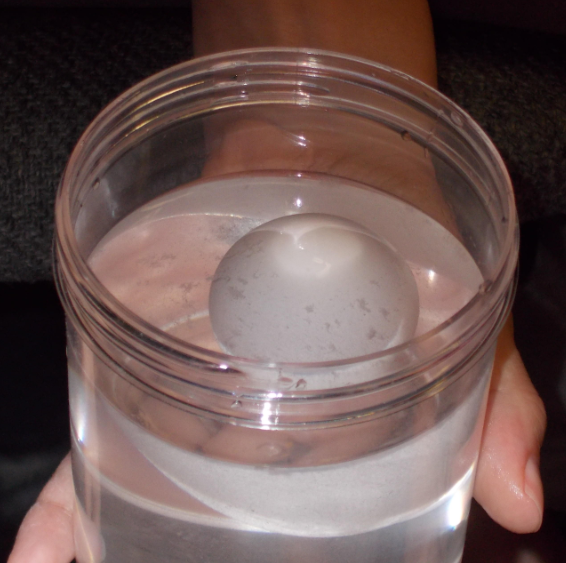
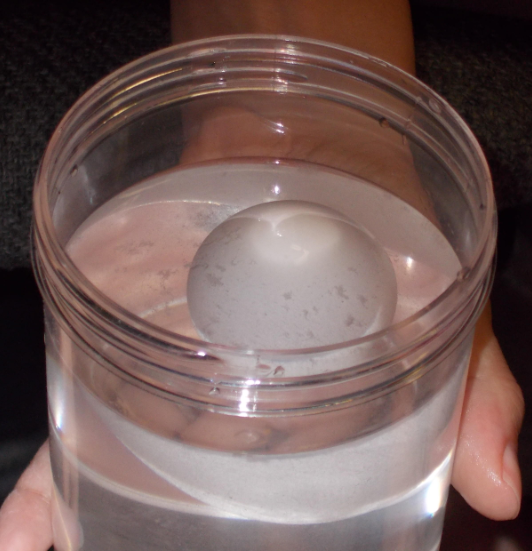
The students experimented with the various densities of liquids during class today. They were given five liquids: water (tinted blue), dish soap (green), honey (tan), syrup (dark brown), and vegetable oil (light yellow). They first predicted the order, then we poured each into a cylinder to observe what happened. We recorded the typical density of each substance. Next, we added four different cylinders: aluminum, acrylic, polyethylene (the white cylinder), and acetal delrin (the black cylinder). They were able to see that the aluminum cylinder sank to the bottom since it has a higher density than honey. Next, the black cylinder stopped between the honey and syrup, the clear cylinder stayed between the syrup and dish soap, and the white cylinder stayed between the water and oil. It was interesting for the students to see solids that would float in some materials, but sink in others. We were able to relate this to math (decimal place value- including comparing and ordering) by figuring out what each solid cylinder's density must be close to. Afterwards, we added isopropyl alcohol (rubbing alcohol) that was dyed red. It was the least dense and stayed on top of the oil. It also smelled the worst- an unwelcome surprise for those who thought it was Kool-Aid! Today we used some basic household materials to show how the density of a liquid can be increased by adding in another substance. In this case, we used water, salt, and eggs. In the first demonstration, we had one container of fresh water and one container of salt water. We cracked open the an egg in each and observed that it will sink to the bottom of freshwater, but will float on top of salt water. The students had some great questions- does it matter if the yolk and albumen are separated? What happens if we stir both containers? What happens if we break the yolk? In the second, we wanted to find out how much salt it would take to make an egg float (still in the shell). We started with fresh water and stirred in small amounts of salt until it floated on top. We used 300ml of water, and it took approximately 40g of salt. We had some great conversations about the egg floating due to the water having more "stuff" (matter/particles) in it to support the egg. |